🎬 Intro #
Look, cheap and mini are subjective so this may not be what you might imagine when you read the title, but, subjectively, this build is mini for an 8 bay NAS with this kind of hardware and objectively, it’s cheap. An off the shelf NAS with this many bays can’t even be found close to this price even in the used market (at least when I looked).
So, what am I doing here then? What I’m always doing, of course. Inventing problems that don’t exist to validate my need to buy and build things.
So in that vein..
I recently built a 100TB raw file server, and this has been working well for its intended use of Linux ISOs. You should go and read that whole series, it took me ages.
Part 1: Building A 'Mini' 100TB NAS
In that post I strapped some SSDs together to create a few TB for a ZFS share, this is already full.
I have needed a good place, offsite, to store backups and some other data that is required for my goal of ‘De-Googling’, and so the need for another file server was born. This, unlike my previous server, would not be an attempt at maximizing capacity whilst still staying somewhat redundant, this is just good ‘ol ZFS goodness. What this build shares with my previous projects is my need to do this as cheaply as possible whilst not cutting corners. (Okay maybe some corners).
🎯 Requirements #
My requirements for this build are pretty similar to most of my other projects like this:
- Power efficient - Power is not cheap.
- Future-proof - This will be my main NAS for storing files, photos and backups, so it has to be solid. At the moment, I need 9TB to fit my needs, so anything 4/5TB more than this will be fine for a few years.
- Small - Where most of my homelab hardware is housed is pretty space constricted.
- Cheap - If I tell myself it doesn’t cost that much, it makes it okay. Right?
I’ll list the parts below and explain the reasoning behind these choices further down.
🌀 Virtualised? #
I had initially planned for this to be bare metal but if you know anything about me, my mind is never made up. I am constantly changing my mind about everything, forever chasing the most efficient use of hardware. The thought of this box idling most of the time and having a modern processor doing almost nothing didn’t sit right.
Whilst I am looking to move from VMware in my homelab at some point due to the Broadcom fuckery, I don’t see the reason to do so quite yet. Proxmox did entice me for this project, but moving all my VMs across my sites to Proxmox would be quite a task and I’m not quite ready for that yet. It’s not like my licences will expire or anything 🏴☠️. The time will come though, and I’ll be sure to write a post about it.
💰 Parts List #
| Item | Quantity | Vendor | Price | Total |
|---|---|---|---|---|
| Intel i3 10100 | 1 | eBay | £59 | £59 |
| Thermalright ASSASSIN X 90 SE V2 | 1 | Amazon | £15.29 | £15.29 |
| ASRock B460M-ITX | 1 | AliExpress | £72.37 | £72.37 |
| 2x16GB HMA82GU6JJR8N DDR4 | 1 | eBay | £40 | £40 |
| Jonsbo N3 | 1 | AliExpress | £21.99 | £21.99 |
| Seasonic SS-350SFE | 1 | eBay | £30 | £30 |
| M.2 E/A Key PCIE Adaptor | 1 | Amazon | £30 | £30 |
| 4TB WD RE4 | 8 | Already Have | £0 | £0 |
| 1TB PM871a | 4 | Already Have | £0 | £0 |
| Intel X520-DA2 | 1 | Already Have | £0 | £0 |
| Intel 10GBASE-SR SFP+ | 2 | Already Have | £0 | £0 |
| LSI 9211-8i | 1 | Already Have | £0 | £0 |
| Cooler Master SickleFlow 92 | 2 | Amazon | £6.27 | £12.54 |
| SFF-8087 Breakout | 2 | Already Have | £0 | £0 |
| SK Hynix 1TB PC611 | 1 | Already Have | £0 | £0 |
| Total Cost (New Parts) | £282.19 |
📋 Parts List Breakdown #
Below will be ordered in the order I decided to constrain myself.
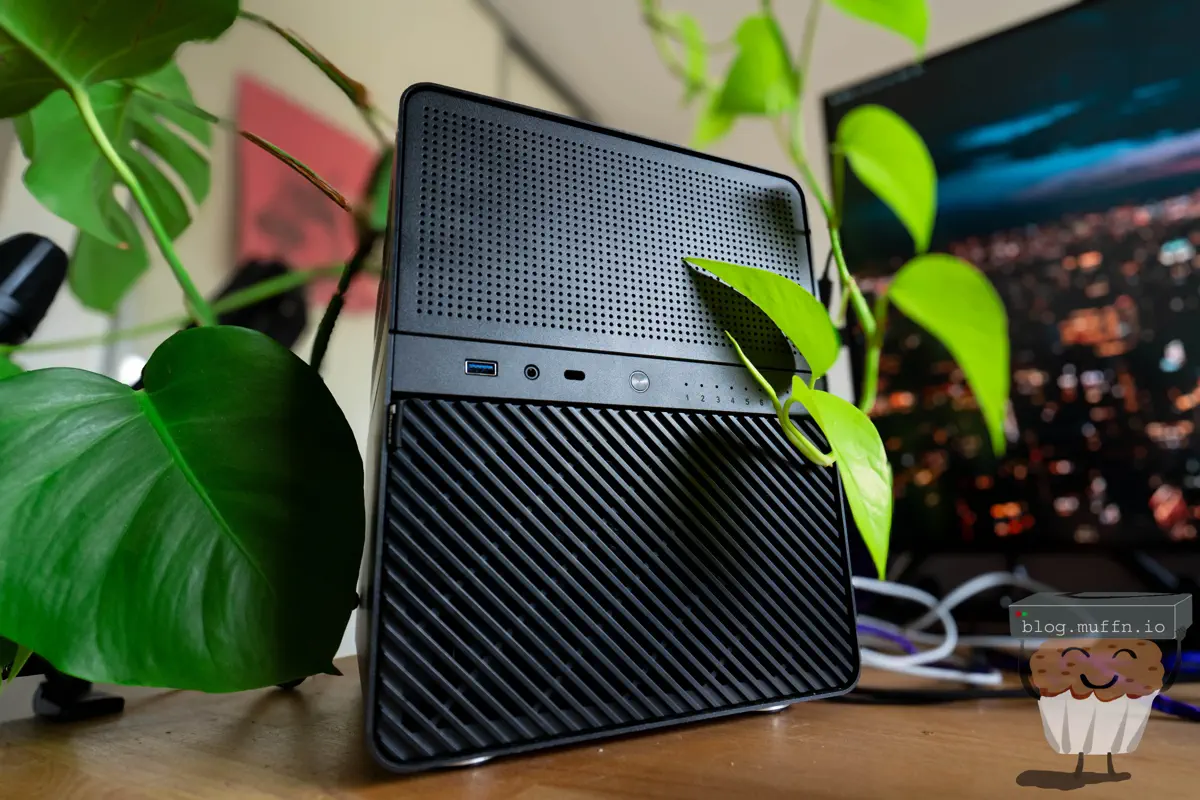
🔹 Jonsbo N3 #
These Jonsbo NAS cases are fucking sweet. Ever since these started making the rounds I’ve been itching to build in one but haven’t had the need to. Initially, I’d wanted to build in the N1 but decided on one of the larger brothers in the end for more bays and generally a roomier build.
The space I am putting this NAS would benefit from more vertical space usage, which the N3 has. There are also various other lines Jonsbo does, including mini versions of some other ones, and the N4 which accepts an mATX board, but decided it was too large for this build (for literally no reason).
🔹 ASRock B460M-ITX #
Finding an ITX motherboard that has everything I needed was not easy. The fan favourite right now are these AliExpress N100 boards:
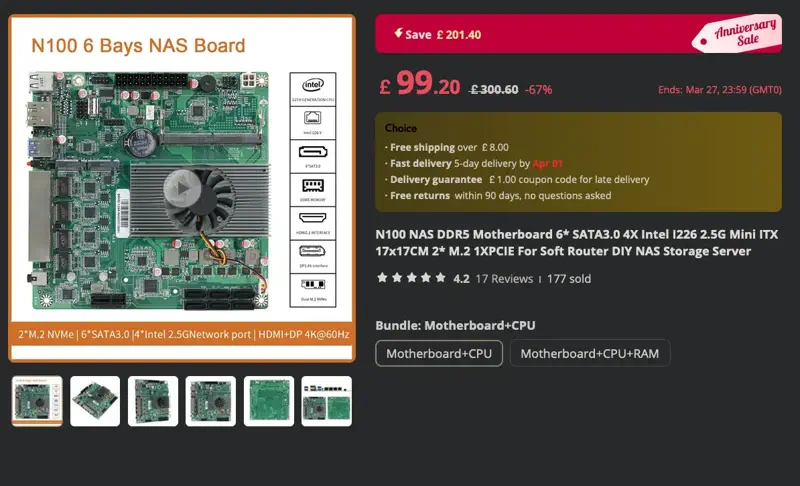
The main issue I had with it is that the PCIE slot only runs at x1, which would be pitiful for a 10GbE NIC. Now that I’m writing this though, I could have probably made it work by converting the M.2 with some risers, but that’s not the way I went.
After a lot of scouring eBay etc. I ended up finding what I needed from AliExpress. This £67.82 listing for an ASRock B460M-ITX was the best thing I could find around that price point. For a modern platform with cheap CPUs and decent hardware it was a no-brainer.
The board only has 4 SATA ports but I plan to use a spare HBA in any case, so the onboard SATA works well for boot drives and ‘miscellaneous’ SSDs.
Another honorable mention should go to this ‘JGINYUE AMD AM4 ITX Motherboard’ which at the time of writing is £55.93. This seems like a pretty decent, cheap board, albeit a ’noname’ brand. I was going to go this route as most of my servers at this point are Ryzen based, however, the used market for Ryzen processors isn’t as plentiful as Intel.
When I weighed up the options between AMD and Intel, the Intel platform slightly edged out in cheapness and ’newness’.
🔹 Intel i3 10100 & Thermalright ASSASSIN X 90 SE V2 #
Cheap. £59 eBay, job done. There were a plethora of 10100F variants on eBay for a decent chunk cheaper, £35-£40 but I opted to spend a little more for the ‘regular’ SKU with the integrated graphics.
For £20~ extra having a very capable GPU on the CPU could benefit me. The plan is to pass the UHD 630 through to a VM which will be used for hardware acceleration for apps such as Immich.
The Thermalright ASSASSIN X 90 SE V2 was the cheapest decent thing on Amazon at the time of purchasing. CPU coolers have become so damn good and cheap now it’s amazing what £15 can get you. The N3 supports coolers up to 130mm so this would fit at 118mm. I’d have opted to use the Intel stock cooler to be honest but they were looking to be around the same price as the Thermalright so why the hell not. The RGB version of this was the same price but no thank you.
🔹 2x16GB HMA82GU6JJR8N DDR4 #
eBay bargain. Not on the HCL for the ASRock motherboard but works just fine. I would have ideally liked 2x32GB sticks but the price increase wasn’t worth it. And yes, this is not ECC. Whilst the board ‘Supports ECC UDIMM’ it then says ’(operate in non-ECC mode)’, so, slow clap. ECC would have been great of course but finding a compatible ITX platform would be within budget was too frustrating.
16-24GB allocated to TrueNAS and the rest for lightweight VMs (Immich Machine Learning, Veeam) should be fine. You do want as much RAM as possible with ZFS for ARC purposes, but I am not chasing performance on this array.
If you are hell-bent on using ECC though (I get it), the Ryzen platform is the much, much better with ECC compatibility.
🔹 Seasonic SS-350SFE #
Another eBay bargain. Seasonic PSUs have long been my go-to when a bargain can be had so I’m happy with this purchase, The N3 requires an SFX PSU and 350 watts is plenty for this.
🔹 Intel X520-DA2 & 10GBASE-SR SFP+ #
10GbE for this build isn’t really required, SMB/NFS is unlikely to be that much faster than gigabit, of which the onboard is an Intel I219V but I already have everything else on 10GbE at this site so it would be rude not to carry that on.
🔹 LSI 9211-8i & 8087 Breakout #
The ‘ol reliable. SAS2 is well within the speed limits of spinning disks and I’m not expanding the ports.
🔹 Cooler Master SickleFlow 92 #
Fans innit, not much to say. Again, cheap and fit for purpose as they are described as
an excellent choice for cases with obstructed airflow (extra air pressure)
These will be a replacement for the stock fans at the rear of the N3.
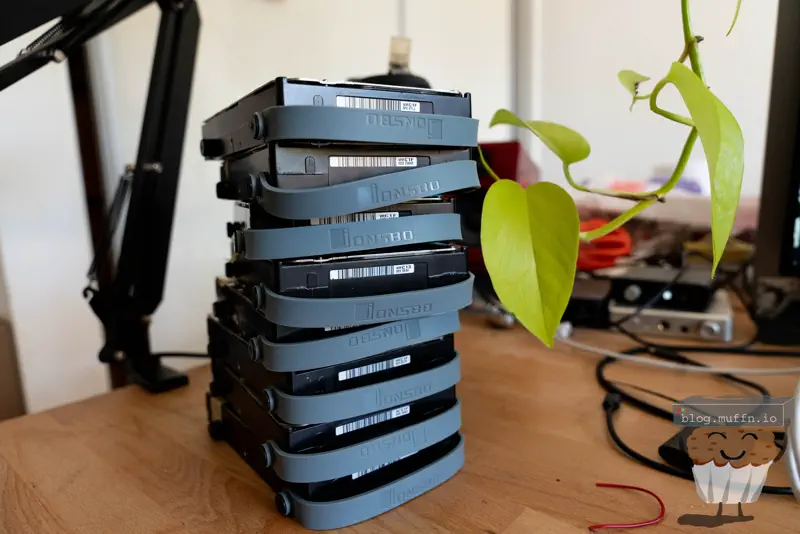
🔹 8x 4TB RE4 SAS/SATA #
I had initially planned to get 5x 10TB HGST DC HC510 drives with the plan to add more later if required, but a trip to my parents house one day reminded me that I have about 30 ‘old’ 4TB drives from my old behemoth:
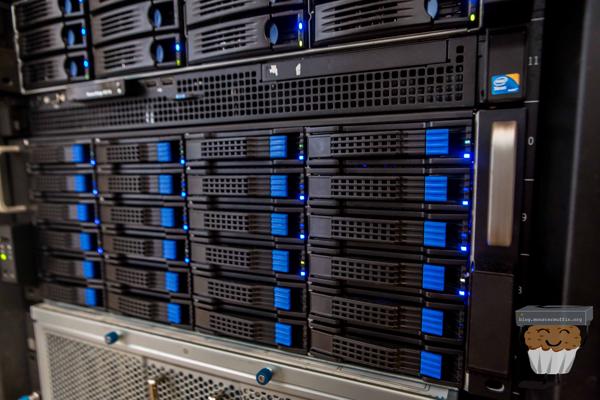
muffin's New Storage
Look, I know 4TB disks are not exciting, or very efficient these days but I already have them and they’re collecting dust. With 8 disks in a RAIDZ2 I get ~20TB of usable storage with excellent redundancy for the low, low price of £0.
20TB should last me a decent amount of time for my backups and photo collection, especially considering I use my camera far less than I would like these days, hopefully this changes.
🔹 SK Hynix 1TB PC611 #
Need an SSD for a boot drive and VM storage, I found this in my spares box from a laptop I must have upgraded or something in the past.
🔹 M.2 E/A Key PCIE Adaptor #
You’ll see below, but basically I needed a PCIE slot for the 10GbE NIC and the only way was to adapt the slot that was usually used for WiFi modules. This doesn’t always work as sometimes this slot really is just for WiFi modules, but in looking at the specs of this board it looks like there are appropriate lanes routed to this slot to do proper PCIe.
😢 ITX PCIE Woes #
Almost all the Jonsbo cases use ITX boards, which by design are small and therefore only have 1 full fat PCIE slot. For a build like this, that slot will almost always be used for a HBA, unless you have the right amount of SATA ports available onboard. This is usually fine, unless you need more expansion cards, which in my case is 10GbE connectivity.
Most manufacturers only wire the M.2 E-key slot with a single PCIe 3.0 lane rather than the two lanes that the M.2 specification allows for. This is a cost-saving measure since WiFi modules rarely need more than one lane.
If we do the math:
- PCIe 3.0 x1 lane: ~985 MB/s theoretical maximum
- 10GbE requirement: ~1,250 MB/s
- Actual throughput: Limited to approximately 8 Gbps instead of 10 Gbps
This doesn’t bother me in the slightest. For my use case I’m never going to get close to saturating even 8 Gbps, let alone 10 Gbps. The spinners are the bottleneck, not the network. Plus, 8 Gbps is still massively better than the 1 Gbps I’d get from the onboard NIC.
So, whilst it’s not the most ideal setup, it does still give me well above Gigabit speeds and uses an expansion slot that would otherwise be unused.
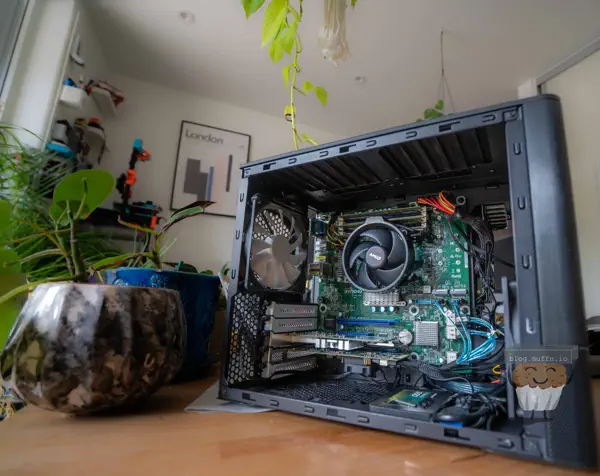
🔧 Impatient Building #
I have got far too used to AliExpress items arriving in under a week, so when the N3 still hadn’t arrived after 2 weeks I decided to start the hardware setup. I wanted to test my parts and have something to move this project on. What I ended up with for a few days was the worst test bench setup ever on my desk.

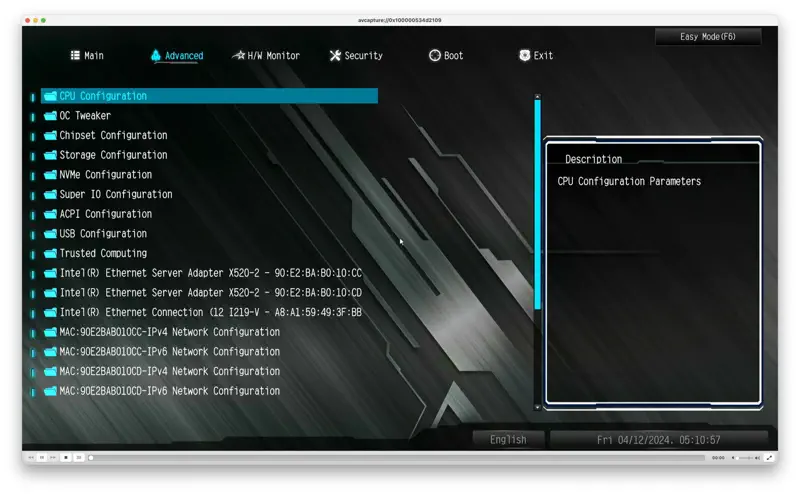
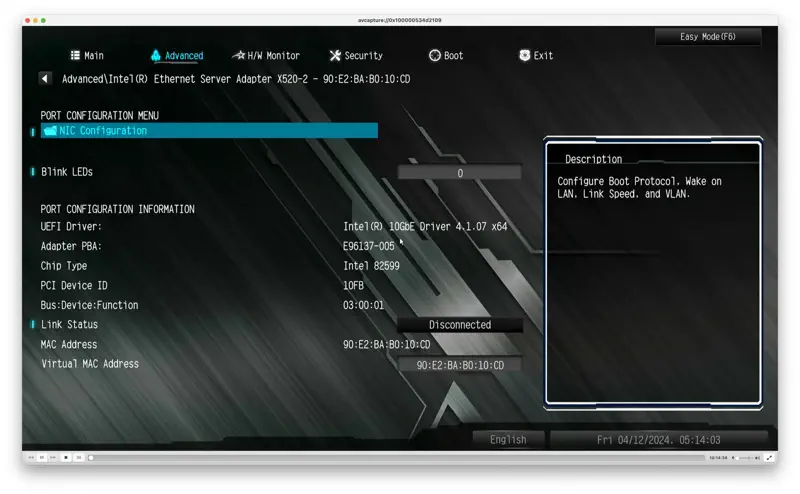
The first thing I saw when I turned the machine on was, well, this.

The BIOS seemed fine, and I made sure to enable some settings, one of the main things for any homelab machine is enable auto power on.

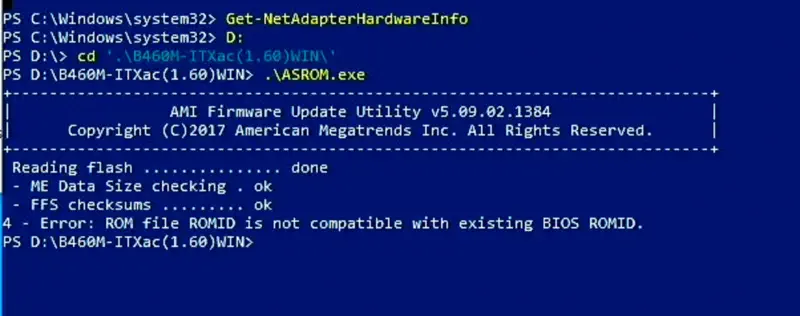
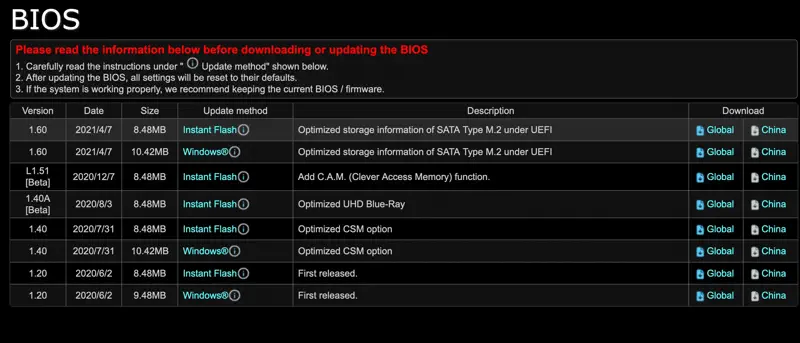
Now, I wanted to see what could be done about this mouse computer BIOS. I noticed the BIOS was on v1.00 and the latest was v1.60 so I tried to update to that using ‘Instant Flash’. After spending a stupid amount of time trying to find Asrock’s Instant Flash I found out that it was only introduced after a certain version, and the only other way was to do the flash via Windows. Fine…
In Windows I tried the update and got the following error, not surprising really considering:
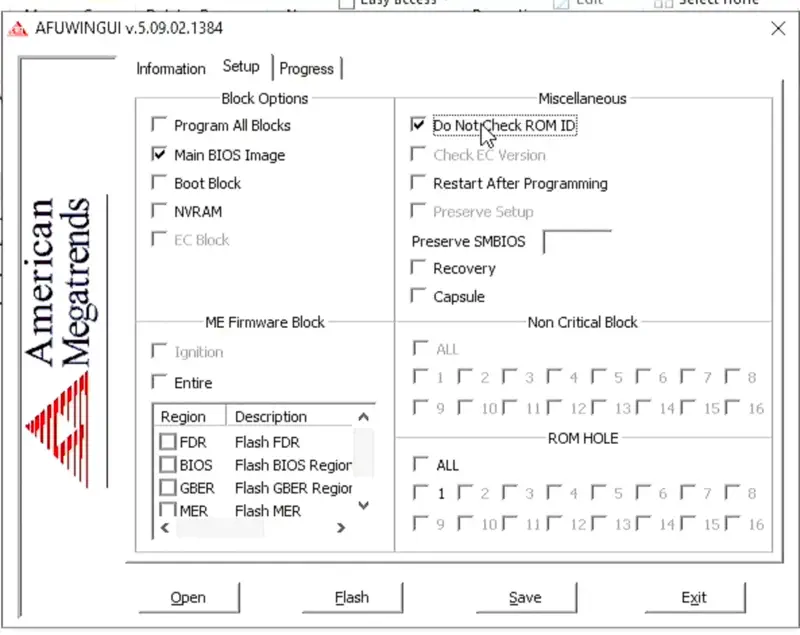
This can be bypassed using the GUI tool with the following option, which I almost did..
🔧 Building #
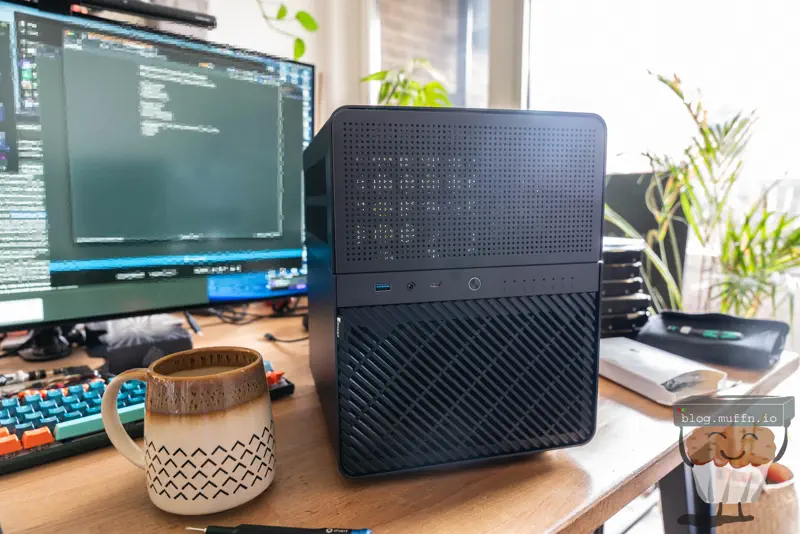
After about 3 1/2 weeks, the case arrived. It’s quite a good-looking case in person I have to say. Feels well-built too. Can’t really ask much more for the price.
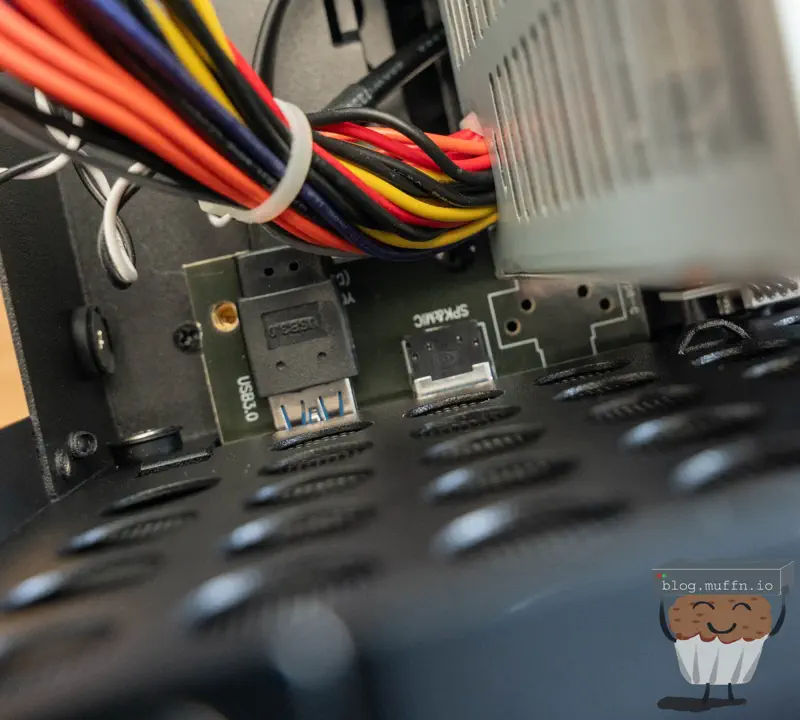
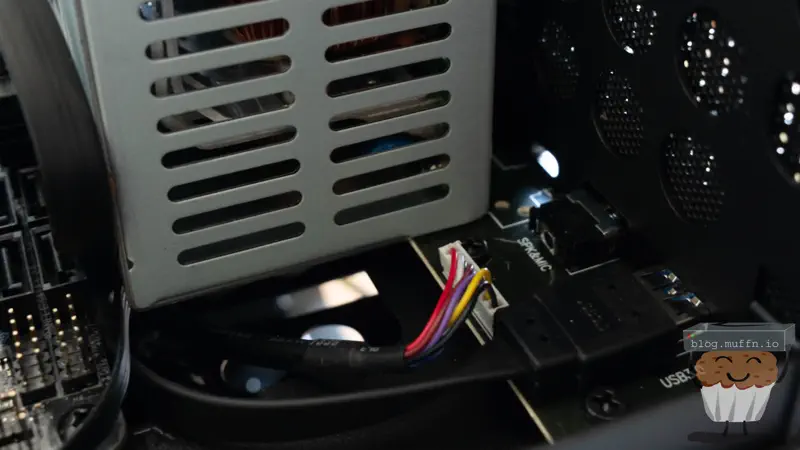
I’m not quite sure what the deal is here but my SFX PSU did not fit without colliding with the front USBC port. Thankfully, the entire front panel board can be unscrewed and the USBC port removed with 2 small screws. I don’t need front panel IO (or, any IO that’s not network) so this was fine but I’m not sure if this is an issue with my PSU or a bad design flaw.
You can see below how the USBC would foul. With this removed the PSU sits flush with the front IO board.
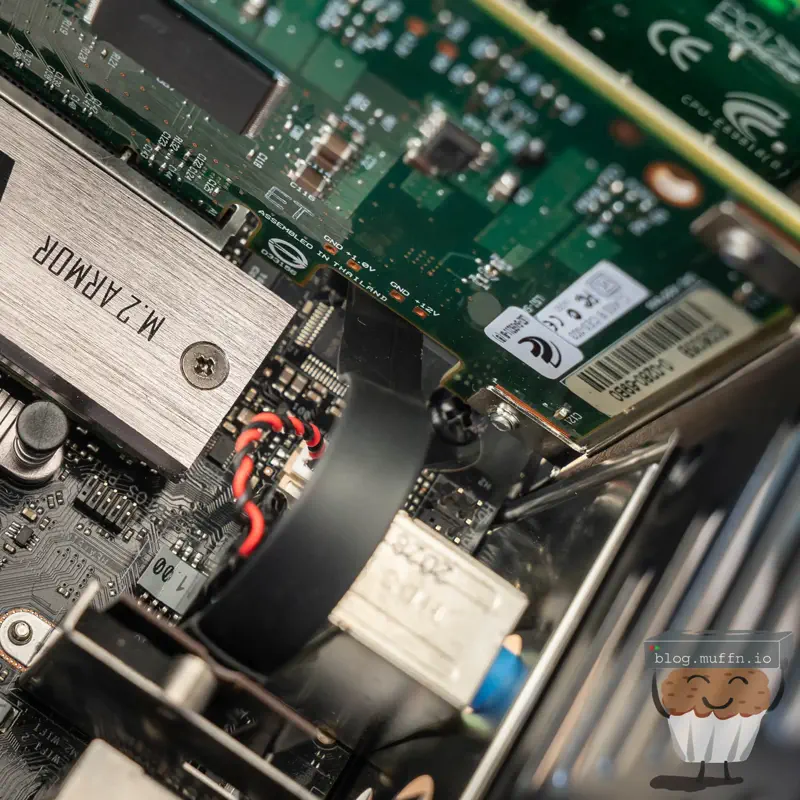
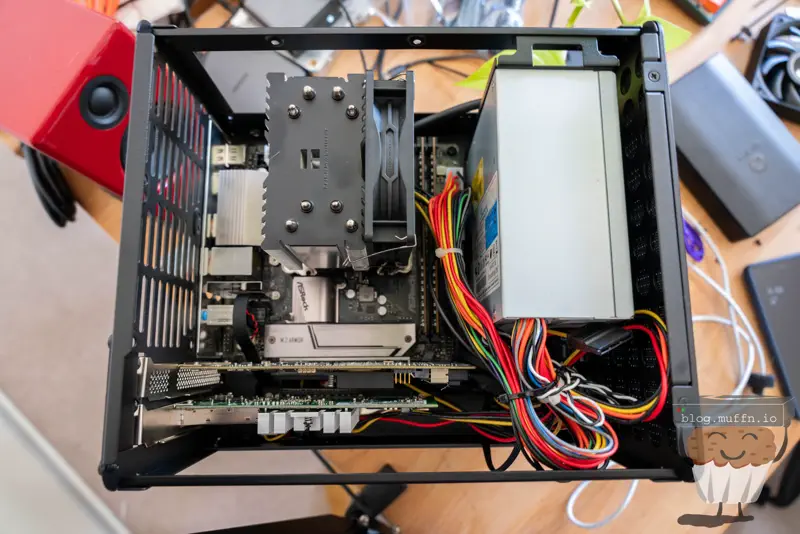
The routing of the E key adaptor worked just as I would have hoped. The flat cable tucked right underneath a gap in the HBA and aligned with everything just as I planned.
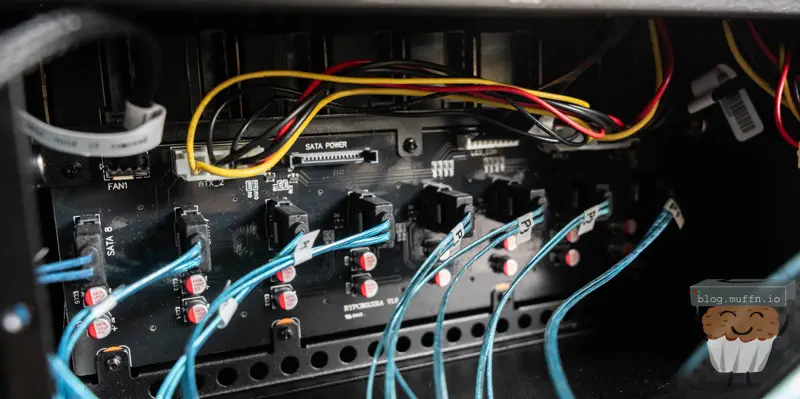
The backplane has 8x SATA ports as expected, 2x molex ports and 2x SATA molex for power. I would assume you can mix and match these if required. For me, the PSU was best equipped to use molex, so I populated the two. Two is the minimum I would use, and it should be fine. Assuming 5-7 watts per HDD gives us 56 watts if they’re all spinning. A molex connector should provide 6-8 amps on 12v, so 2x would give us 144-192 watts. With these calculations even 1x should be enough but better to be safe.
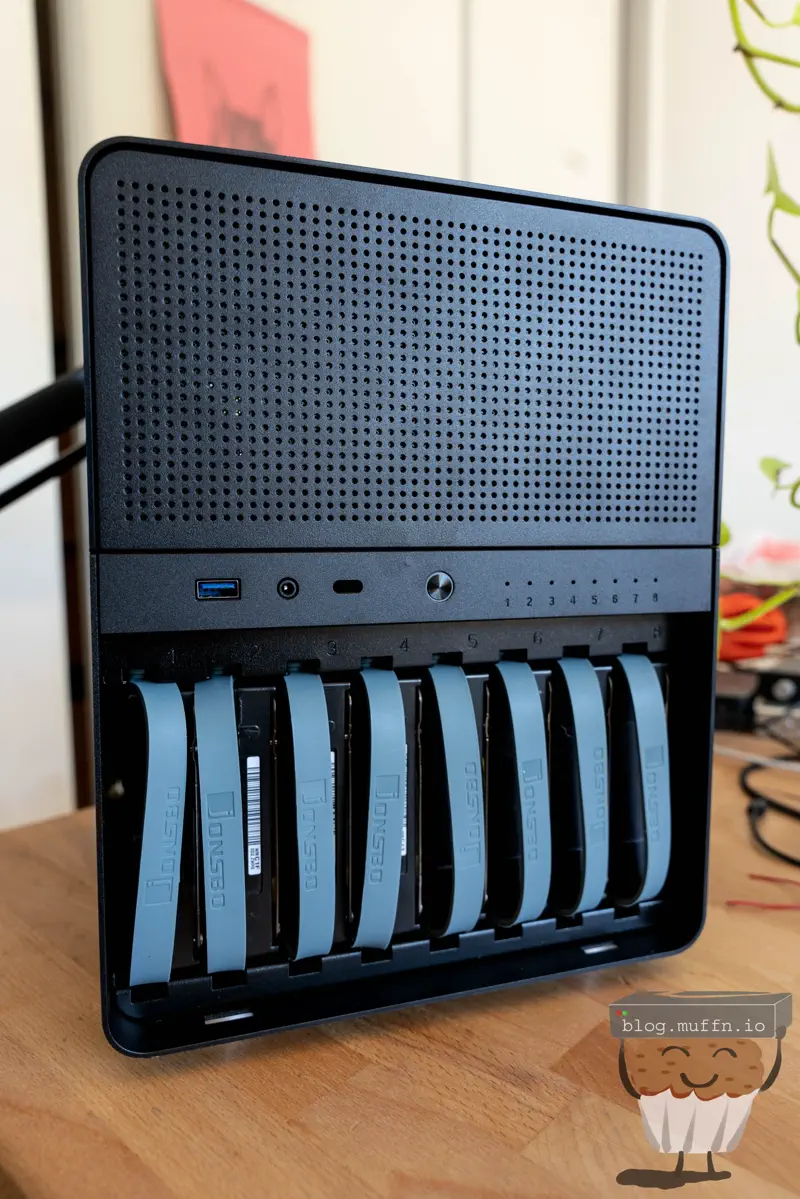
Overall I do quite like the mounting solution Jonsbo have gone with. I’m sure not having caddies has contributed to a cost saving, and it’s nice to not have to deal with caddies. It’s important to not squish the mounts though, as they will not slide into the bays on the case.
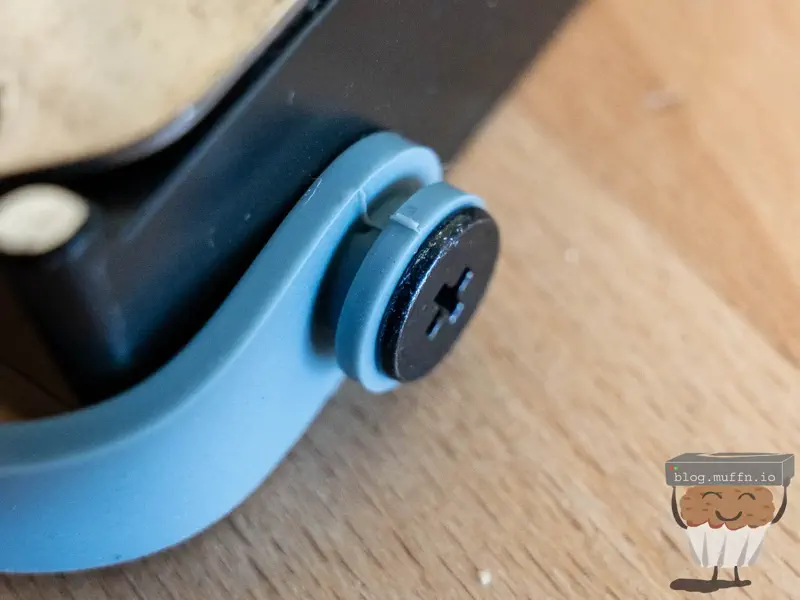
Everything aligns just right and doesn’t feel loose. And yes, the backplane supports SAS, which is good because my disks are all SAS 😛.

It’s quite a lovely sight to see it fully populated, hats off to the Jonsbo engineers.
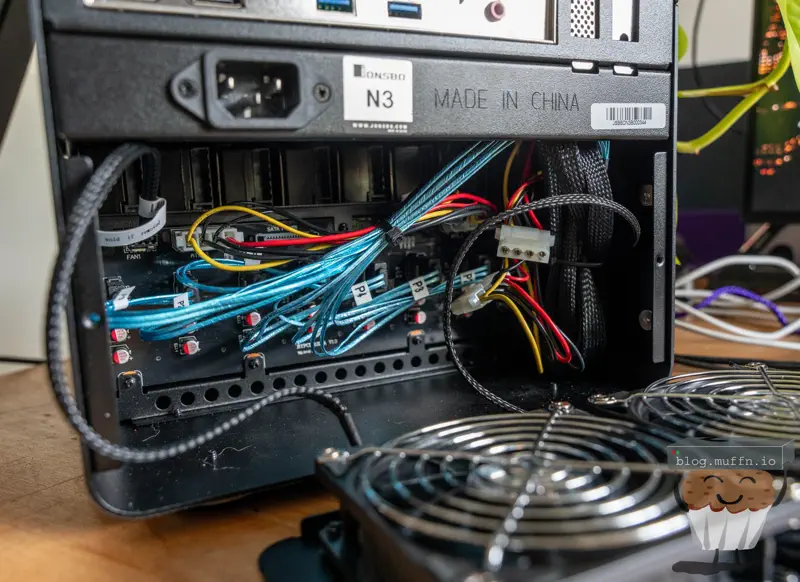
The insides aren’t the tidiest but it is what it is, the CPU AUX power from the PSU just fit being stretched across the motherboard, but everything did fit.
🥞 Setup #
The software side of all of this is pretty simple and less interesting. I installed ESXi on the boot SSD and then installed TrueNAS on a VM with 16GB of RAM and 4 vCPUs.
I created another VM too which is used by Immich for machine learning. This VM has the iGPU passed through to it, and TrueNAS has the HBA passed through to it.
ESXi handles the networking, the 10GbE NIC with the adaptor works like a charm.
Likewise with the machine learning VM, passthrough of the Intel iGPU ‘just works’.
        _,met$$$$$gg.          muffin@immich-ml01
     ,g$$$$$$$$$$$$$$$P.       ------------------
   ,g$$P""       """Y$$.".     OS: Debian GNU/Linux 12 (bookworm) x86_64
  ,$$P'              `$$$.     Host: VMware Virtual Platform
',$$P       ,ggs.     `$$b:    Kernel: Linux 6.1.0-37-amd64
`d$$'     ,$P"'   .    $$$     Uptime: 15 days, 5 hours, 15 mins
 $$P      d$'     ,    $$P     Packages: 641 (dpkg)
 $$:      $$.   -    ,d$$'     Shell: zsh 5.9
 $$;      Y$b._   _,d$P'       Display (Virtual-1): 1280x800 @ 60 Hz
 Y$$.    `.`"Y$$$$P"'          Terminal: /dev/pts/0
 `$$b      "-.__               CPU: Intel(R) Core(TM) i3-10100 (2) @ 3.60 GHz
  `Y$$b                        GPU 1: Intel UHD Graphics 630 @ 1.10 GHz [Discrete]
   `Y$$.                       GPU 2: VMware SVGA II Adapter
     `$$b.                     Memory: 674.70 MiB / 3.82 GiB (17%)
       `Y$$b.                  Swap: 0 B / 980.00 MiB (0%)
         `"Y$b._               Disk (/): 14.13 GiB / 29.97 GiB (47%) - ext4
             `""""             Local IP (ens192): 10.82.7.138/24


❯ sudo lspci
00:00.0 Host bridge: Intel Corporation 440BX/ZX/DX - 82443BX/ZX/DX Host bridge (rev 01)
00:01.0 PCI bridge: Intel Corporation 440BX/ZX/DX - 82443BX/ZX/DX AGP bridge (rev 01)
00:07.0 ISA bridge: Intel Corporation 82371AB/EB/MB PIIX4 ISA (rev 08)
00:07.1 IDE interface: Intel Corporation 82371AB/EB/MB PIIX4 IDE (rev 01)
...
13:00.0 VGA compatible controller: Intel Corporation CometLake-S GT2 [UHD Graphics 630] (rev 03)
I considered these 4 ZFS layouts:
🔹 Option 1: Single RAIDZ3 vdev (8 disks) #
- Usable Capacity: ~18.2TB
- Pros: Maximum redundancy (survives 3 disk failures)
- Cons: Slower writes, longest rebuild times
🔹 Option 2: Two RAIDZ2 vdevs (4 disks each) #
- Usable Capacity: ~16TB
- Pros: Better performance than Z3, faster rebuilds, survives 2 disk failures per vdev
- Cons: Less usable space than Z3
🔹 Option 3: Four mirrored vdevs (2 disks each) #
- Usable Capacity: ~8TB
- Pros: Best write performance, fastest rebuilds
- Cons: Half the usable capacity of Z2, only survives 1 disk failure per vdev
🔹 Option 4: Single RAIDZ2 vdev (8 disks) #
- Usable Capacity: ~20TB
- Pros: Good redundancy (survives 2 disk failures), higher capacity than Z3
- Cons: Less redundancy than Z3, slower than striped vdevs
In the end I ended up with an 8 wide Z2 vdev (option 4). This gives me 20.56TB of usable space with N+2 redundancy.
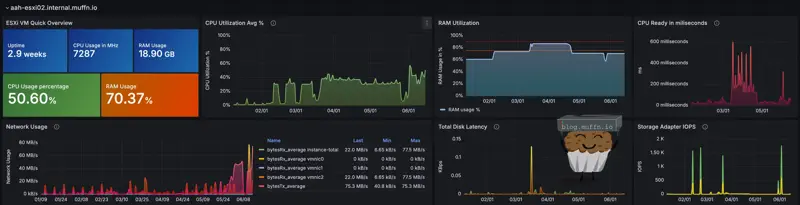
🚀 Performance & Stats #
Some obligatory fio benchmarks showed everything to be within expectations, if not a little better than expected.
🔸 Sequential Read (64K blocks, 8 jobs) #
fio --name=seq-read --rw=read --bs=64k --numjobs=8 --size=5G --runtime=60 --group_reporting

Results: READ: bw=487MiB/s (511MB/s), IOPS=7795
🔸 Sequential Write (64K blocks, 8 jobs) #
fio --name=seq-write --rw=write --bs=64k --numjobs=8 --size=5G --runtime=60 --group_reporting

Results: WRITE: bw=201MiB/s (211MB/s), IOPS=3216
🔸 Random Read (4K blocks, 16 jobs) #
fio --name=rand-read --rw=randread --bs=4k --numjobs=16 --size=1G --runtime=60 --group_reporting

Results: READ: bw=24.3MiB/s (25.5MB/s), IOPS=6215
🔸 Random Write (4K blocks, 16 jobs) #
fio --name=rand-write --rw=randwrite --bs=4k --numjobs=16 --size=1G --runtime=60 --group_reporting

Results: WRITE: bw=8.97MiB/s (9.41MB/s), IOPS=2296
🔸 Mixed 70/30 Read/Write Mix (8K blocks) #
fio --name=mixed --rw=randrw --rwmixread=70 --bs=8k --numjobs=8 --size=2G --runtime=60 --group_reporting

Results: READ: bw=18.1MiB/s (19.0MB/s), IOPS=2318
         WRITE: bw=7.85MiB/s (8.23MB/s), IOPS=1005
The results are more than adequate for my use, as a backup server it’s been more than fine, being able to backup TBs of data at well beyond gigabit, and as a file server acting as a backend for some critical applications, such as Seafile and Immich it’s also never missed a beat. The r/w speeds never leave me wanting when using these apps.
I feel like the spec choice was the right one too, it has enough grunt but no so much that it’s overpowered.
We can see Veeam here being able to write this backup at 173MB/s. It could of course be faster but there are a lot of factors at play with this, it’s just nice to know I am able to do such things at well above gigabit.

As for TrueNAS itself, it’s as rock solid as always. I use TrueNAS as way to configure ZFS, CIFS and NFS the easy way, not to use as a ‘do everything’ box so I can’t comment on those features.
The new(er) cloud syncing tasks have been working well, it’s essentially a GUI wrapper for rclone and that’s a great thing. I am quite easily able to saturate my 5Gb internet connection sending backups to the cloud.
The disks definitely do have times where they are being utilised 100%, but they are spinners after all so if the system couldn’t use them fully then this would be pretty shit.

🏁 Fin // Changes? #
This build turned out exactly as I hoped - a cost-effective, compact NAS with solid performance and excellent redundancy.
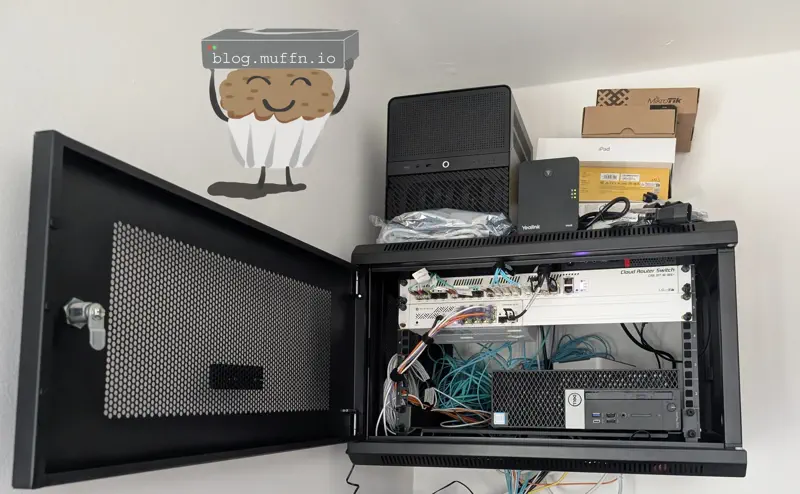
One reason I was initially happy with this case was that its measurements made it so that it would fit on top of the network rack in my main lab site, and that it did. I was a bit skeptical about the weight at first (I didn’t install the rack) but after a good few months it’s still there so, good, I guess?
So, changes…
My strategy in my lab has changed quite a lot. I still do need this NAS but having it virtualised is less of a priority. My strategy going forward will be for more bare metal, so at some point I do foresee installing TrueNAS on the machine bare metal.
But.. all this fun stuff is a post for another day. For now, this has been a great success. A performant and cheap build.
As usual, I hope this was in some way useful!
💡 Revisiting This Build #
It’s been around a year that I’ve been using this NAS and it’s been pretty set and forget for the most part. Performance has been in-line with what I’d expect, easily hitting 2.5-3GB/s writes when needed. After a few drive failures and replacements with more of the same RE4s, I finally bit the bullet on upgrading. The nail in the coffin was watching these old drives struggle during resilvering. Iostat showed each drive maxed out at 99-100% utilisation while only managing 2-5MB/s throughput each, with 6-8ms wait times and tiny 4-7KB request sizes.
Resilver was maxing at ~246MB/s which is pretty slow. Looking into the SMART results shows my oldest drive had accumulated 81k hours with 51 grown defects, while another showed 141 grown defects despite fewer hours.
I managed to snag 4x 10TB HGST HUH721010AL5200 enterprise drives for a relative bargain, £260 for 4x with a returns window. These drives are known for excellent reliability, and most had about 50-60k hours on them, but with 0 defects. I know lots of people do not touch used disks with a barge pole, but I am of the thinking that if a few die, I still save a shit load of money in the long run.
The process was overall very time-consuming since some of these drives come with Data Integrity Feature (DIF) enabled, requiring full reformats to 512-byte sectors which takes literal days, followed by another few days for the actual resilver. Doing it in chunks lets me properly burn-test each drive within the 30-day return window though so it’s not all bad.
I now have 52.2TB of usable space, and performance has improved. Sequential reads now sustain around 650-750MB/s, sequential writes to 280-320MB/s. Random I/O has seen the biggest improvement with 4K operations nearly doubling,
muffn_
