This is kind of a part 5 of my 100TB NAS project/series, well, it is and it isn’t but I’ve included it as part 5 regardless.
In part 3 (below) I briefly discussed what I was dubbing ‘project stacc’, a plan to allow for an easily expandable system to the NAS I had built. The software stack (MANS1) was designed around easy expansion, so not being able to expand the system physically seemed short-sighted.
As it stands at the time of writing, I have about 15TB free in my MANS array, but I already have the spare 804 sitting in my apartment taking space, so it made sense to build it into a DAS as planned and get a head start on the expansion.
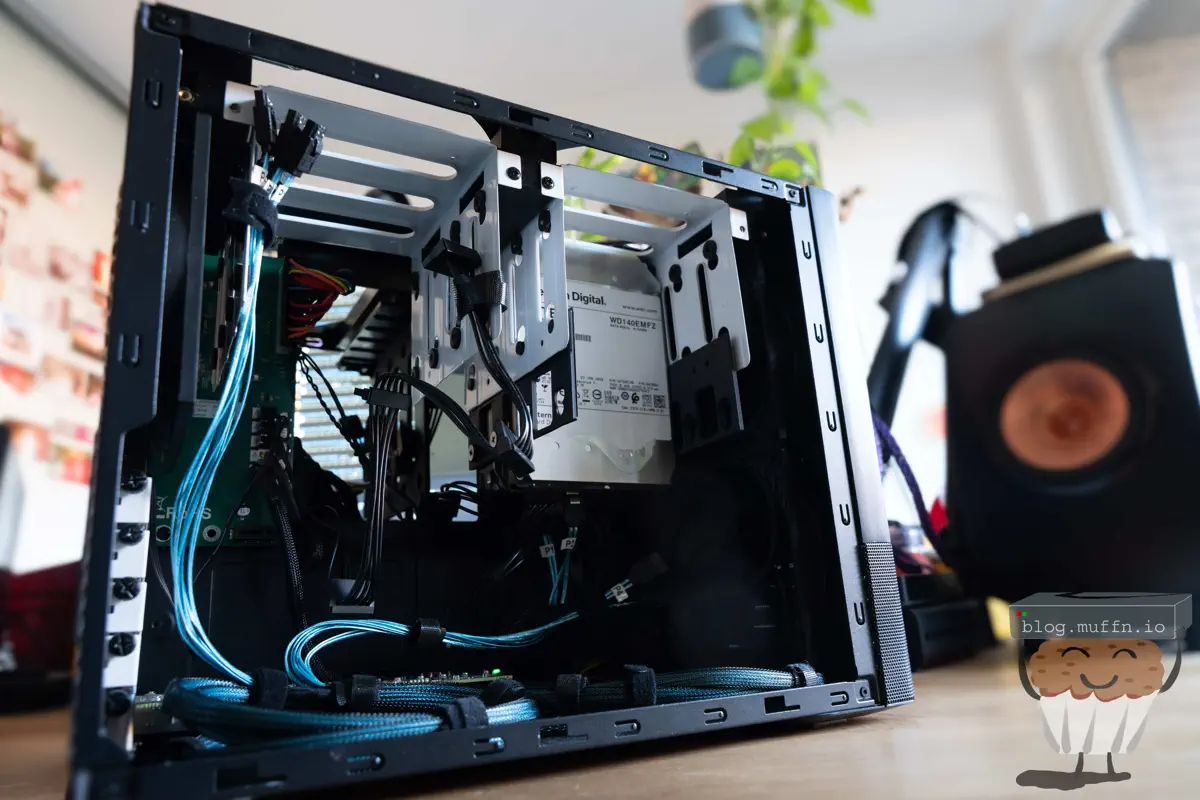
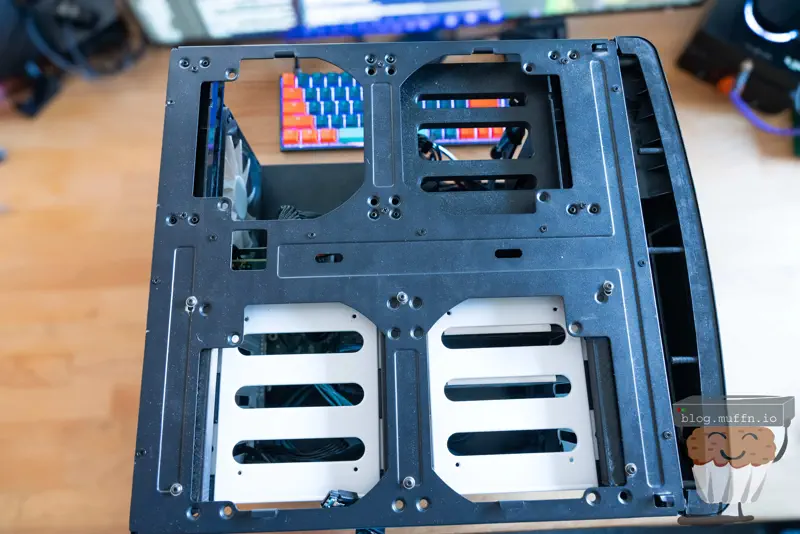
The Node 804 is well regarded as a great NAS case. It’s relatively small and the layout is great for housing the 8 drives it does by default. There are two sections in the case, one houses the motherboard and all that stuff, then the other side has the PSU and 2x ‘hangers’ that hold 4 drives each. If you’re unfamiliar, you can read my build in parts 1 and 2 which have more details and pictures.
If an 804 can house 8 drives in its stock configuration, then surely it can house at least 16 if we don’t have a motherboard, right? Well it turns out I wasn’t the first person to think of this, there is at least one Reddit thread about this. The Imgur album attached to that thread is unfortunately gonezo’d now.
That user was able to buy the spare parts from Fractal and basically mirror the drive side of the 804 to the other side. This would not be as straight forward for me…
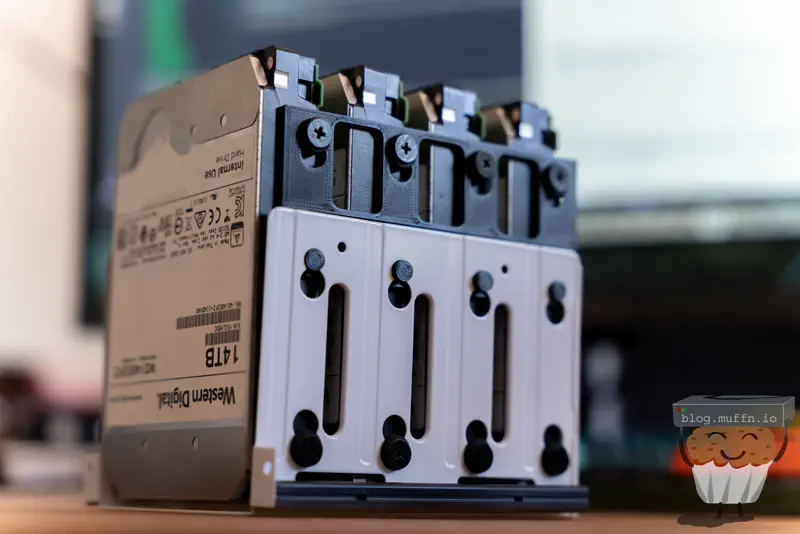
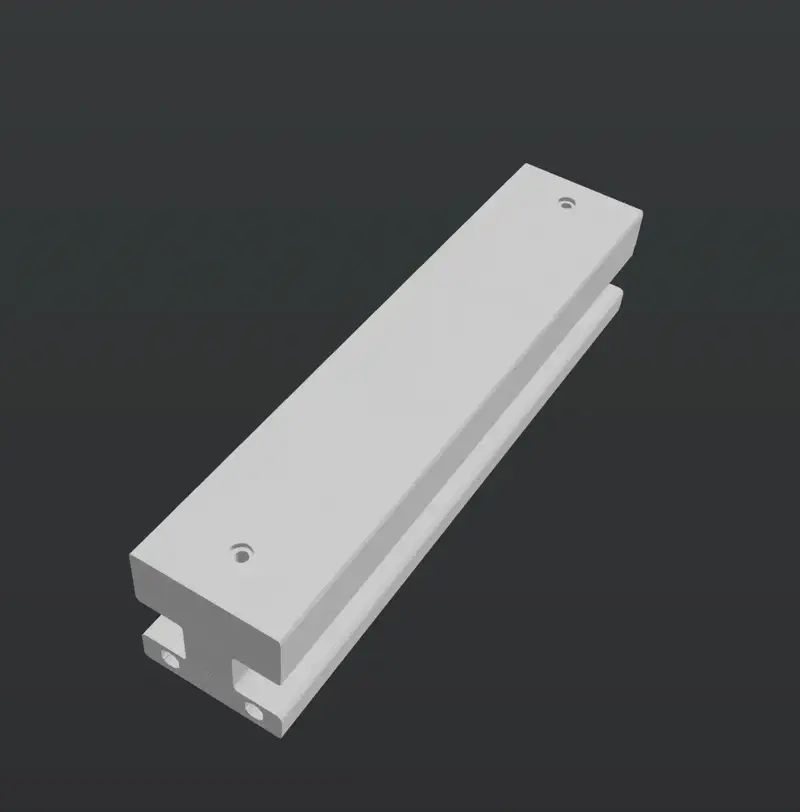
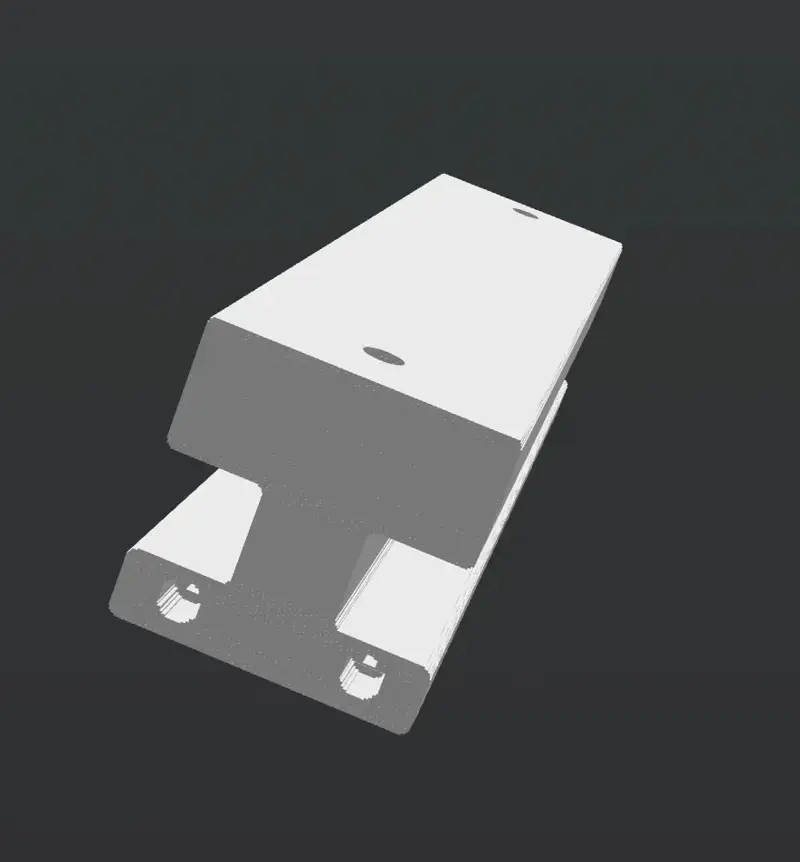
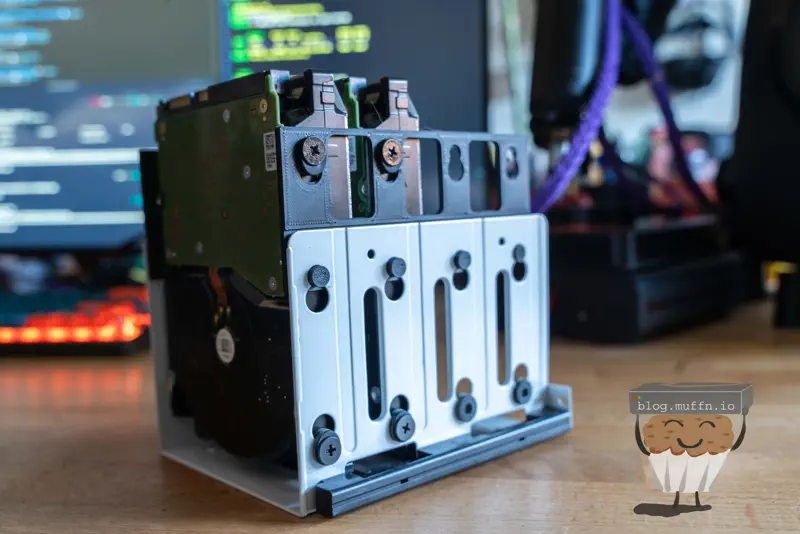
As covered previously, the 804 uses drive hangers that look like this to hold the drives (pictured upside down):
Note: the 804 is rather old now and the drive hangers do not support the mounting of larger capacity drives. Fractal do have adaptors which they will send you for free, but I find these are not as good as the 3D printed adaptors pictured above.
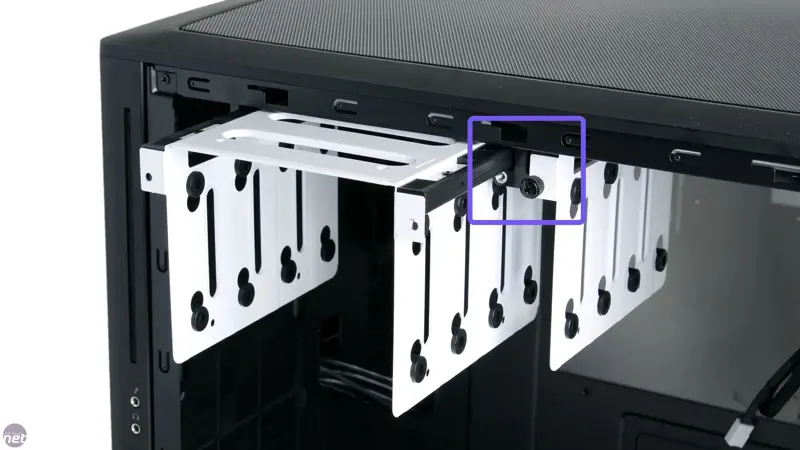
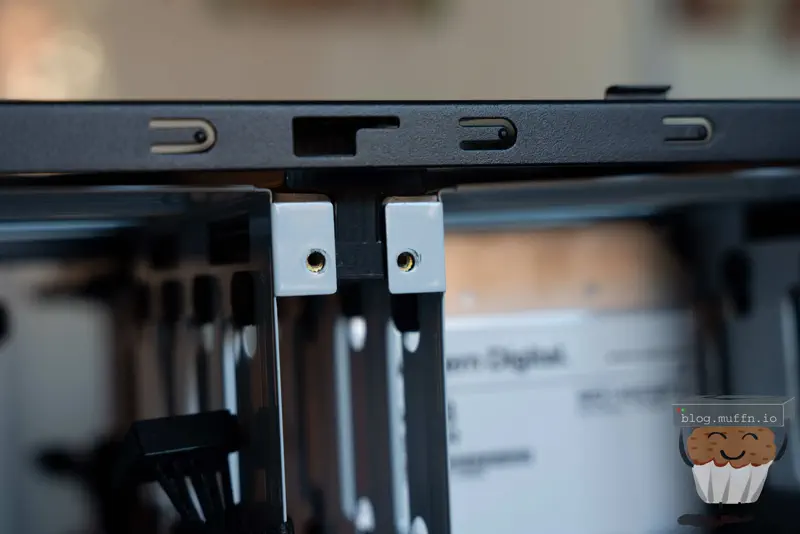
These drive hangers are ‘hung’ from two ‘rails’ on the inside of the case. The rails are held in place by two screws each. In total there are 3 rails, with the center rail holding both of the drive hangers and the outside rails holding the outside of each drive hanger.
Here you can see the central rail holding both of the drive hangers:
Image courtesy of bit-tech.net
In an ideal world, all that would be needed (as per the Reddit thread) would be to buy the following:
3x 804 Cage/Hanger Rails
2x 804 Cage/Hangers
Assorted Mounting Hardware
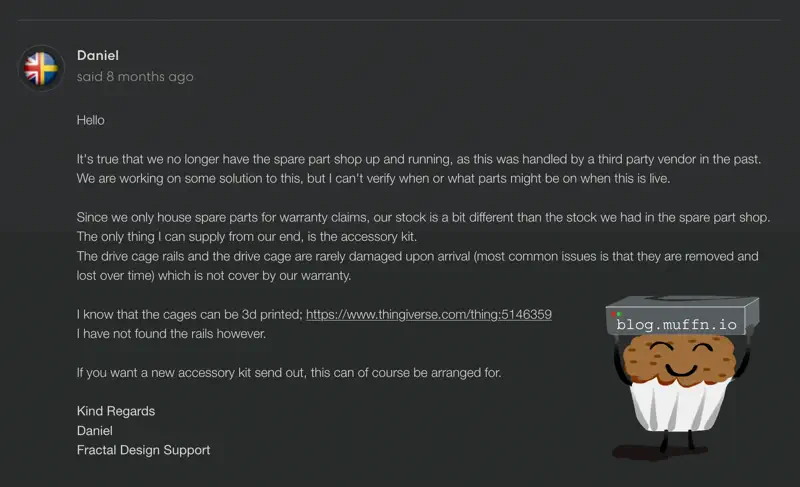
Unfortunately, life is rarely this simple. Whilst an abundance of spare parts were once available from Fractal Design themselves, they no longer have this.
Not knocking Fractal Design at all, those that have read my other posts will know how much I love their products and their support is top-notch, but it’s a shame all the same. In the ticket where I asked them about purchasing the parts required, they did say they are looking to get spare parts available again but were unable to send me the specific parts I needed.
With any luck if you are wanting to do this they have their spare parts site back up, but if not, not all is lost so fear not.
They did send me drive kits though, which come with the HDD adaptors and HDD mounting hardware, the latter of which is very useful for this build.
With official spare parts out of the question, I fired up Fusion360 and was about to start designing the parts when, as per usual, some other people much more talented than me had already done the hard work.
The following 3D files were exactly what I needed:
And that’s pretty much all that’s needed apart from the actual mounting hardware. With these two parts the drive assemblies of the 804 can be mirrored on the other side.
The rail design is the central one intended to hold two drive hangers, but it works equally well in place of the single drive rail on either side of the case.
I neglected to take many pictures during this whole process, mostly because I was doing little bits and bobs here and there as I had some time, so there was no real consistent process. The case would sit in our spare bedroom for months at a time waiting for me to remember it existed or be bothered to do anything, alas, I did finally get my ass in gear.
Printing the parts was straight forward, I printed them in ABS on my Voron 2.4 with my ‘shit’ filament as I did not care how these looked, just so long as they were strong enough and accurate.
The rails are designed well with one caveat, the mounting holes were as is. This probably works fine, but I opted to enlarge the holes of the rail in the slicer to allow for heat-set inserts to be used.
This is obviously pretty crude but does the job just fine. The goal is simply to bore the hole to allow for inserts to be used, and it worked well.
Mounting the rails was easy enough, although I did do a rather awful job at it. I measured where the holes should be based on the side with existing mounting holes, then marked the holes and drilled them out.
Once the holes were drilled and I realised I’d fucked it up, I had to adjust the holes slightly to get everything aligned but I did in the end get it all mounted with the drive hangers able to slide in and out.
I used M3 screws to mount the rails to the case as the heatset inserts were M3 threaded. Some washers on the screws gave me a bit more leeway with the mounting.
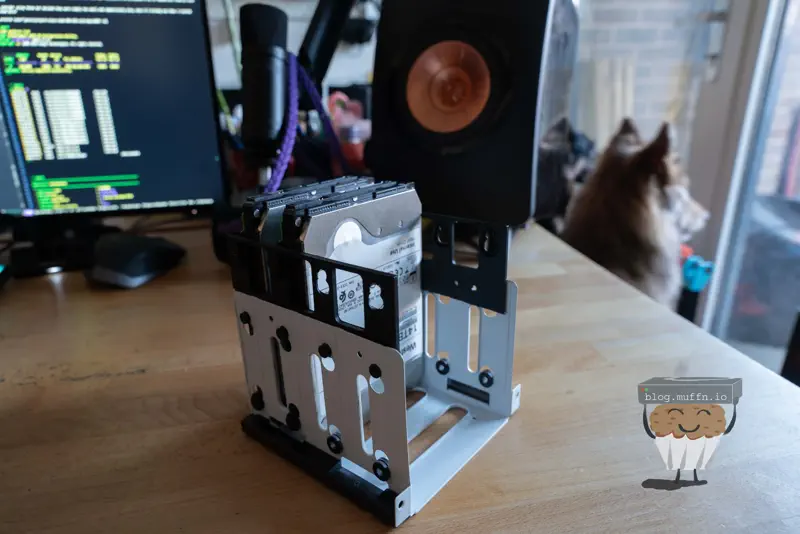
I opted to use the original, metal hangers on this side of the case so I didn’t have to worry about the tolerances of both the 3D printed rail and the drive hangers. The drive hangers fit almost perfectly. When sliding in and out they tend to slightly bind up requiring more force than you would expect compared to the originals, but this is entirely due to the shitty job I did at mounting the rails. If they were spaced out correctly and perfectly straight there’s no reason they shouldn’t slide in and out with the same ease as the originals.
There are, however, some minor issues with mounting these rails into this compartment.
The IO shield area has some protruding metal which would normally hold the IO shield in place and generally keep the IO area of the motherboard ‘slotted in’. The new printed rail hits into this, so what I ended up doing was just getting some large snips and cutting the protrusion out. I unfortunately do not have any pictures of this, but you’ll work it out if you’re attempting this. Once some cuts have been made you will be able to twist and remove the offending bit of metal.
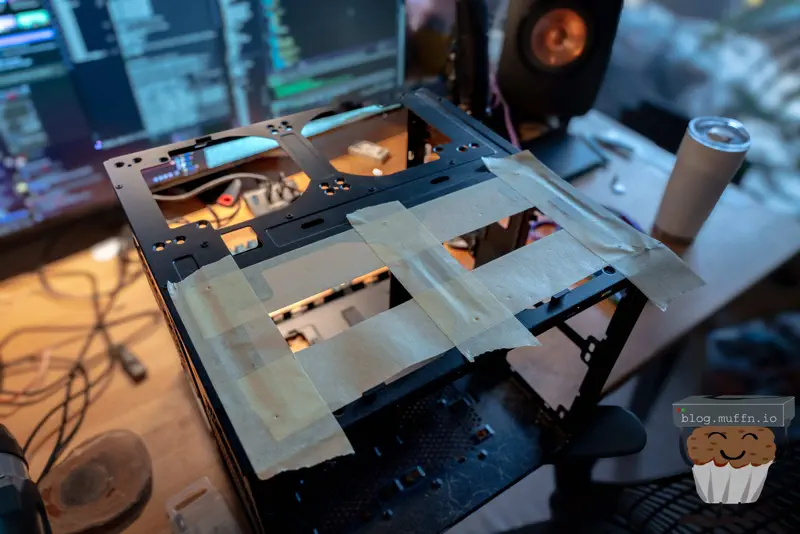
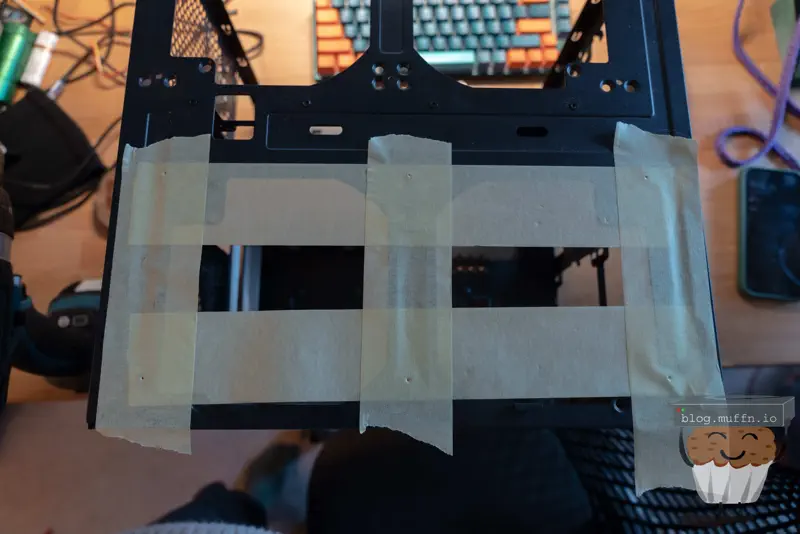
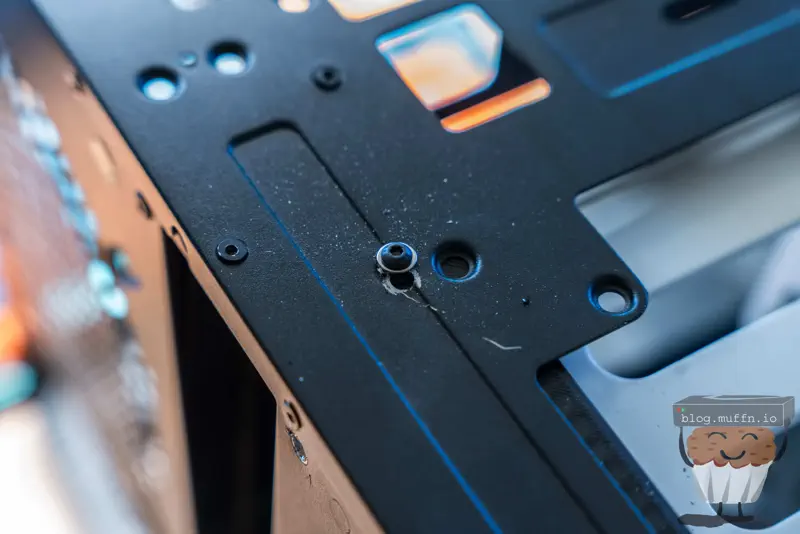
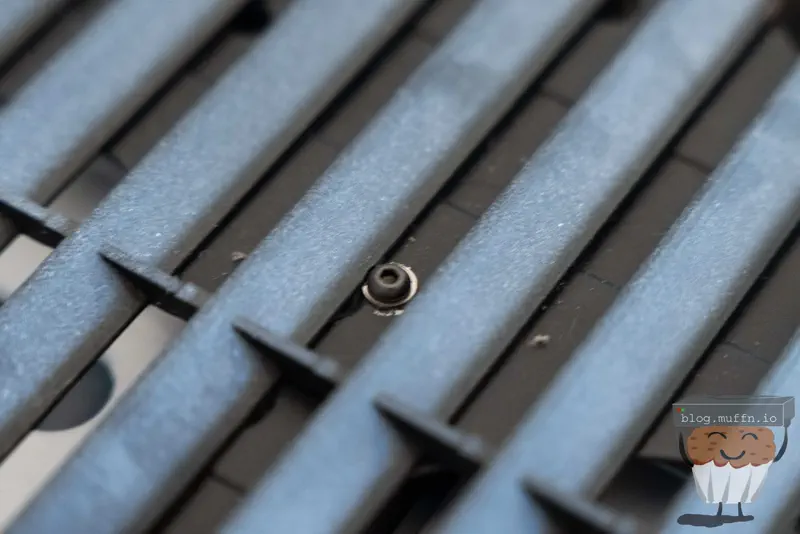
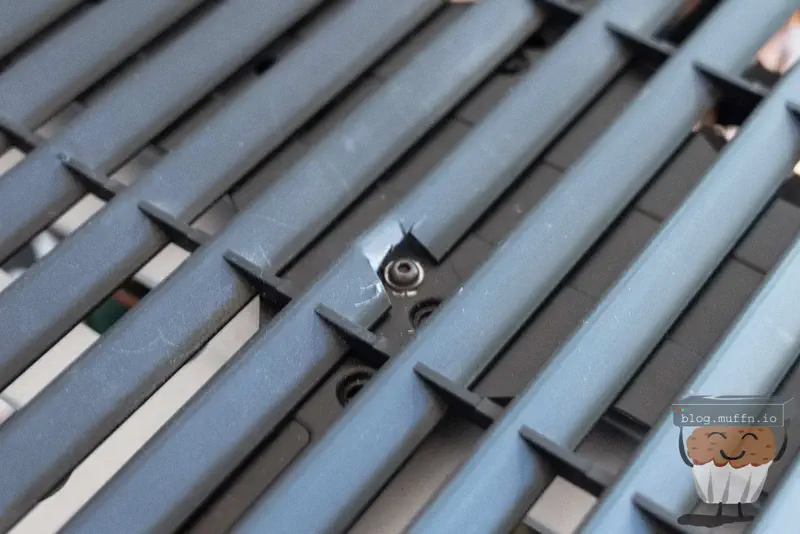
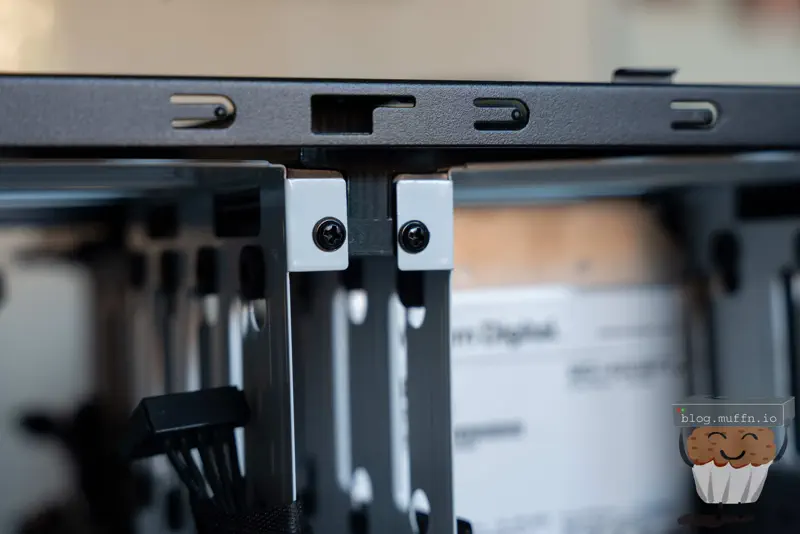
When attempting to slide the top of the case on there was something fouling the part and the top would not go on properly. I found out that the plastic on the top of the case was catching on the screws I had used to mount the rails. You can see in the images above that the screws used by Fractal sit flush with the top of the case, whereas the buttonhead screws I used was causing the top to catch.
I just ended up cutting a notch in the plastic like so to allow the top to slide on.
Whilst flat screws may work, there is a chance they would still catch on the plastic as the proper mounting points sit recessed, so either way this cut may be required.
The heatset inserts worked well for mounting the rails to the case, I’m not sure how the creator of the part intended the rails to be mounted, IMO heatsets should have been intended from the get-go. I would not recommend screwing the rails to the case relying on the plastic of the printed part to hold the weight of the drives.
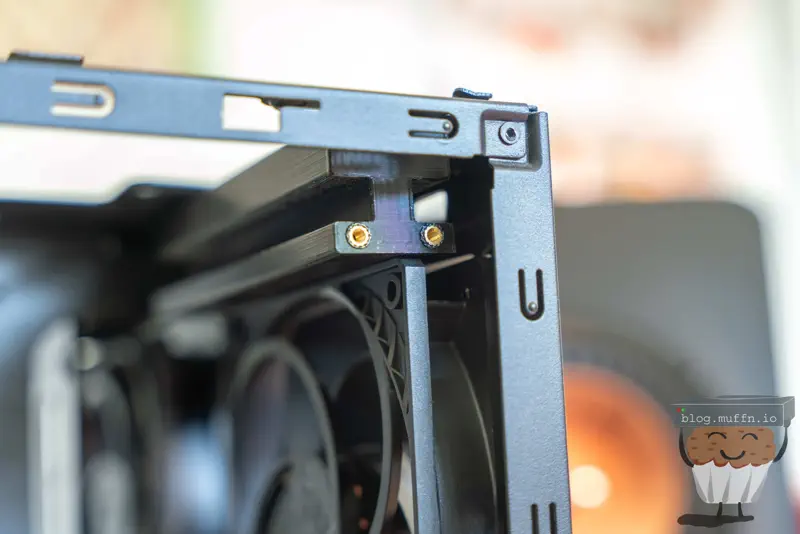
The alignment of the hanger screws to hold it in place was perfect.
The rail just clears the top of the rear fan of the 804, so no modifications are needed there, which is great.
As far as the changes required to get 16x drives in a Node 804, that’s pretty much it. With minimal cost and effort you can create a DAS out of a Node 804. Of course, this isn’t the end of things, whilst we can physically fit 16x drives in the case, we need to connect them to the main NAS.
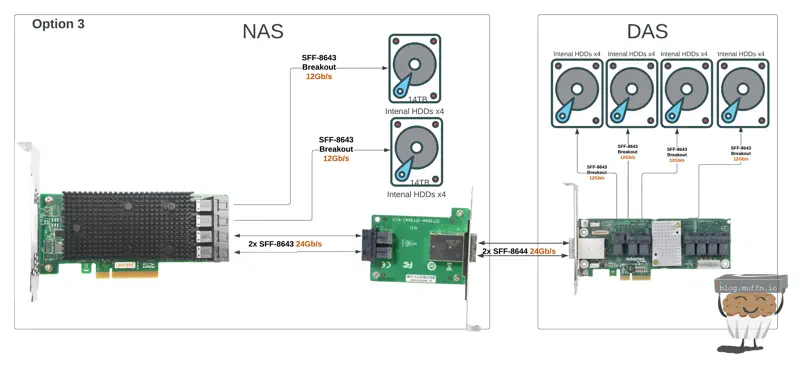
In part 2 of this series I went over the planning for a future where I could expand with a DAS. I ended up settling on this configuration at the time:
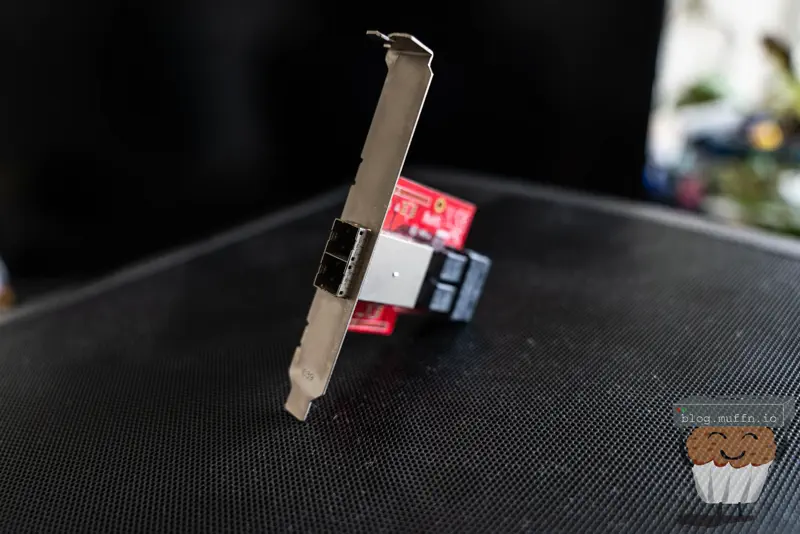
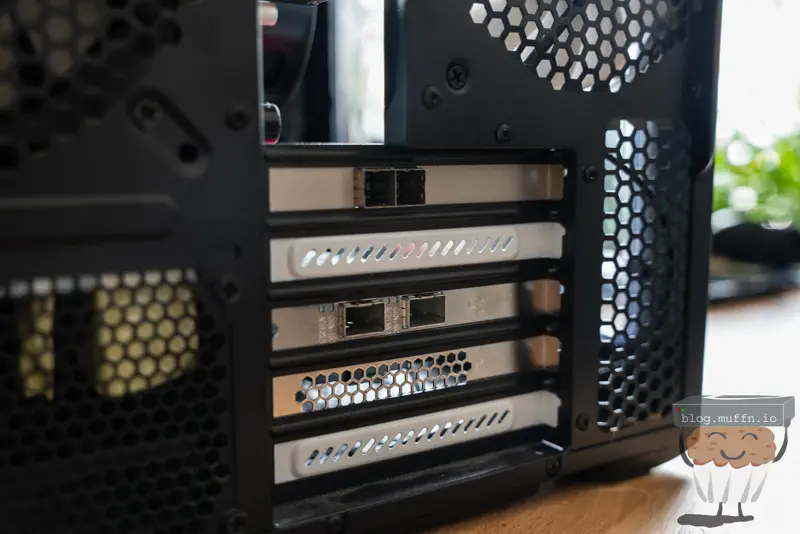
Where my NAS currently stands is kind of the way there, with a Startech adaptor which takes up to 2x SFF-8643 and converts this to allow for 2x SFF-8644 to be connected to the HBA externally. At the time of writing, the Startech adaptor is mounted, the HBA I am using is the original SAS9300-8i which is currently connecting the 2x hangers of 8x drives in the NAS.
Which presents 2x SFF-8644 on the rear of the case as per:
To complete the build I needed to order a few things to get this all electrically connected:
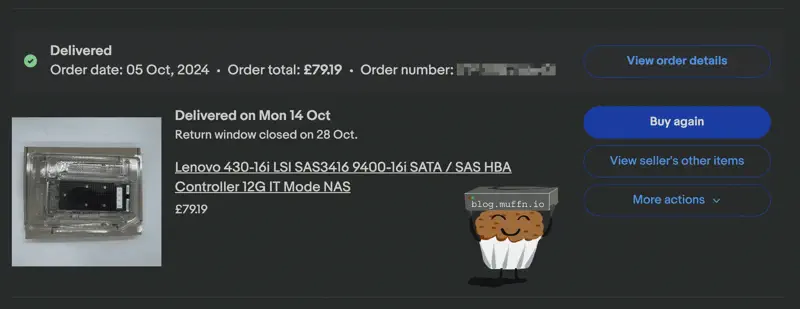
The rationale for selecting these cards is detailed in part 2 of this series, but to put it shortly these are two affordable cards that do what I need. The 16i card allows me to keep the 2x sets of drives in the NAS connected to the HBA, whilst giving me 2x more connections to play with.
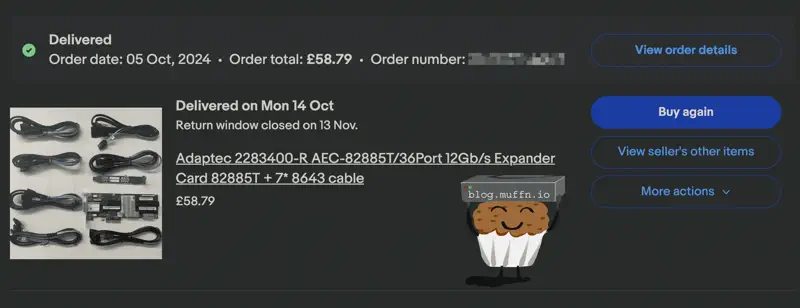
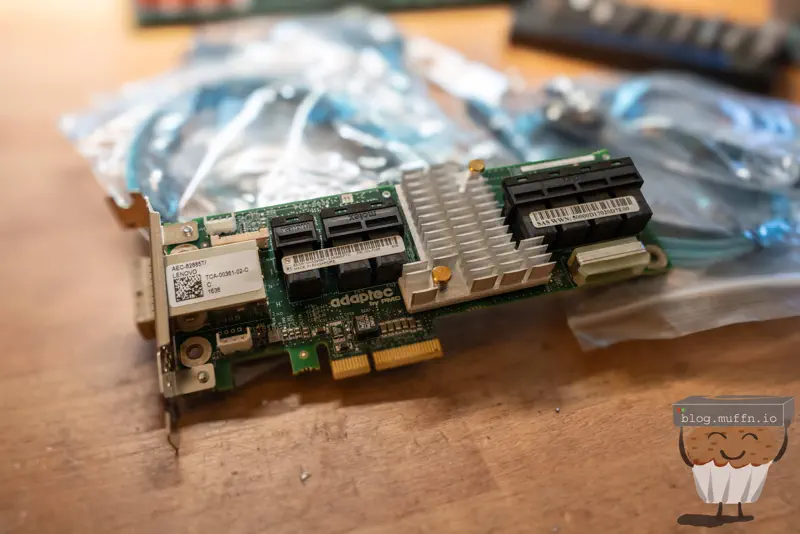
The 82885T is a godsend of a card. It’s a SAS expander2 that has 2x external SFF-8644 ports, allowing the card to be uplinked to a HBA whilst having 6x internal SFF-8643 ports to connect to the drives, which gives a total of 24x drives if not used with another expander. The cherry on top is that this card is widely available for cheap.
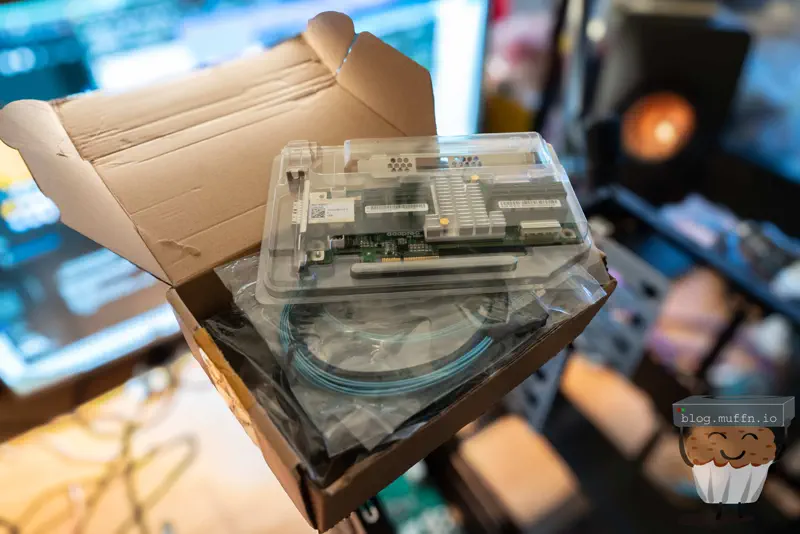
I got an LSI branded 9400-16i and the 82885T on eBay from Chinese sellers for good prices. £79.19 for the 16i and £58.79 for the 82885T, inclusive of shipping and taxes.
Buying from eBay was even cheaper than sites like Aliexpress. There are a lot of posts online about how these cards sold from China are fake, which may well be the case for one of or both of the cards I purchased but to be honest, if they function as expected with official firmware I don’t think I really care.
This is foreshadowing.
The Adaptec 82885T is actually a great deal as it came with 7x SFF-8643 breakout cables, which can add up if you need to buy them separately.
For a PSU I went with the trusty Antec EA-550 Platinum rated PSU. I bought a few of these a while ago as I found a seller on eBay that had a few, brand new, unused and they have yet to fail me so far. Sadly, this is my last one but at least it’s being used!
The ‘ol classic 5 pack Arctic P12 for £21.99 from Amazon. I actually got a fan DOA from this order which hasn’t happened before. The fan blades had come off the motor shaft and I couldn’t press it back in which unfortunately meant I had to return the entire pack of 5, but this was replaced.
The only things really left are the cables. In total:
PSU cables - Attached to the PSU as it’s not a modular unit 🙃.
SFF-8643 Breakout - Included with the Adaptec 82885T.
SATA breakout power cables - I always use these for projects like this as it makes connecting drives easy - 2x Cable Matters 2 pack from Amazon for £9.99 each.
SFF-8644 > SFF-8644 - For connecting the 82885T to the main NAS - 1.5M 10Gtek from Amazon for £27.59.
SFF-8643 > SFF-8643 - For connecting the HBA to the converter 8643>8644 converter in the NAS - 2x 0.5M 10Gtek from Amazon for £20.99.
With that all in hand there was one final piece to this puzzle, OpenJBOD.
OpenJBOD is a fantastic open-source project designed by my good friend @Danish to simplify the process of building disk shelves.
I’m not going to say I inspired this project but the timing is suspiciously close to my original build and he did bring this up with me at the time 👀.
Traditionally, JBODs/DASs are enterprise-grade storage solutions composed of a few key components:
A chassis or case.
Power supplies.
A control plane for managing power status.
One or more SAS expanders.
We have all of these bits already, bar the control plane, which is where OpenJBOD comes in. The OpenJBOD project aims to democratize what was once a hassle in the process of building a disk shelf like this.
The OpenJBOD board allows for easy management of a JBOD chassis, providing a web interface for configuration and monitoring. Things such as fan management and power control would be otherwise quite difficult to manage as there’s no real ‘brains’.
Now, this part of the build isn’t strictly necessary, there doesn’t need to be any brains at all. You could wire the PSU to always start when power is applied and that would work just fine, and it’s what I would have done had Danish not made OpenJBOD.
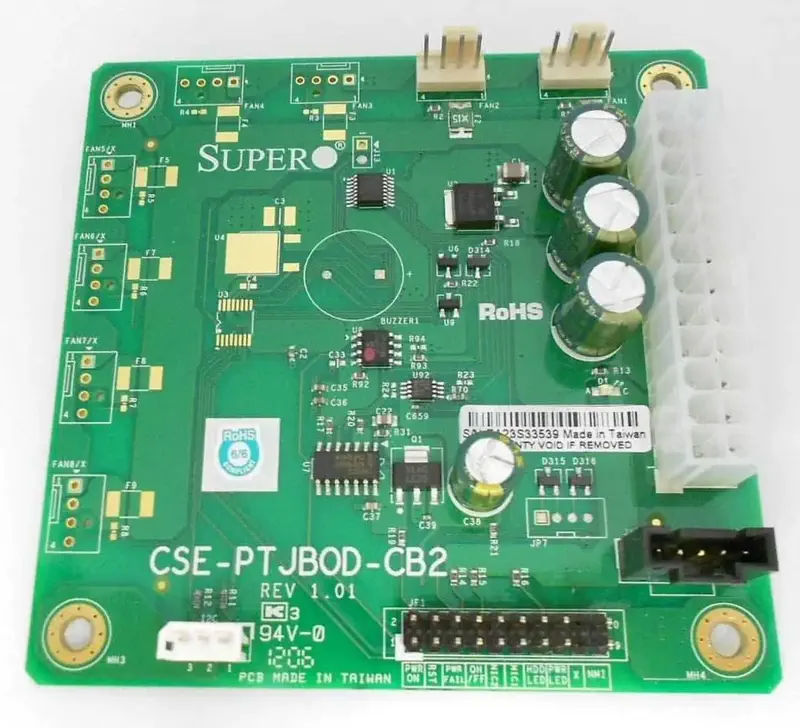
As far as I am aware, the best way previously to do this was the CSE-PTJBOD-CB2. I’ve worked with disk shelves before which use these boards and they are good for the job, but nowhere near as good as the OpenJBOD.
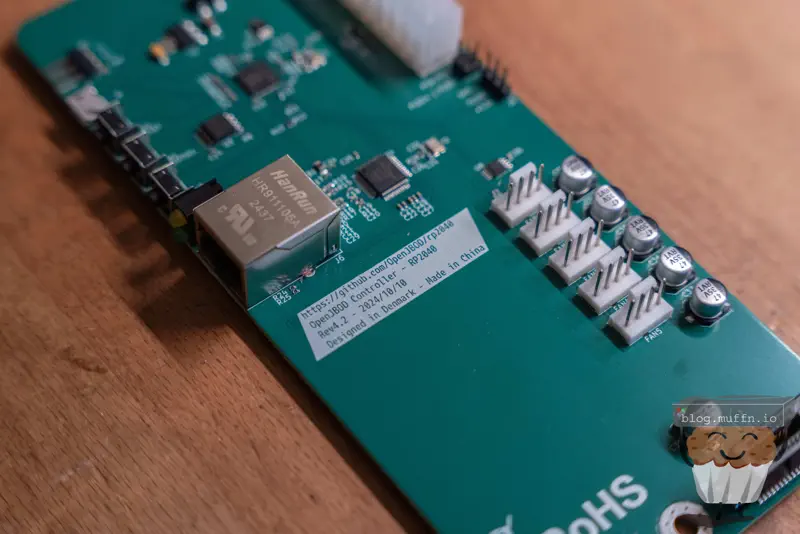
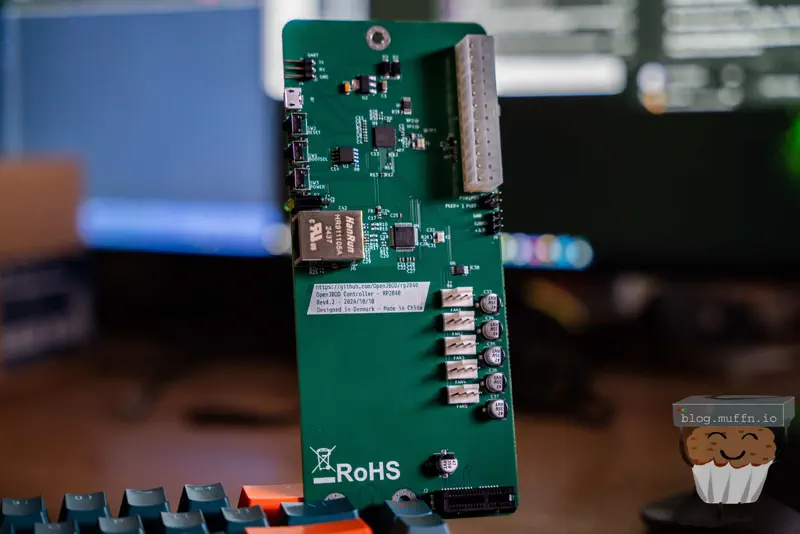
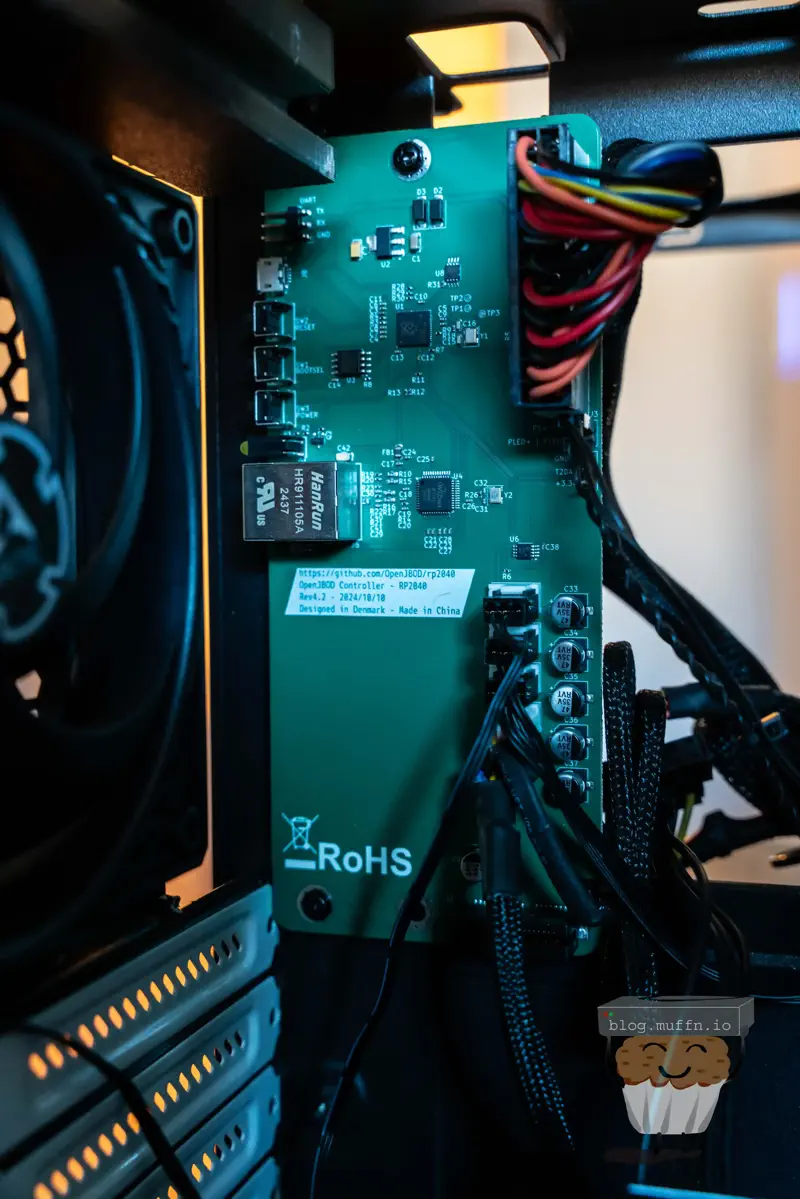
At the heart of the OpenJBOD project is the OpenJBOD RP2040, an open-source control plane built around the Raspberry Pi RP2040 microcontroller. It handles network management over Ethernet, ATX power supply control, and has a PCI-e slot for standalone SAS expanders. There’s also a fan controller with five headers, an on-board temperature probe for fan curve responses, and an optional external probe for readings near the disks.
The OpenJBOD Software is a MicroPython-based package that provides network-based management for the RP2040 board. You get configurable networking, authentication with unique user accounts, customizable power-on behaviour (immediate power-up or USB-triggered), and fully customizable fan curves.
OpenJBOD lowers the barrier to entry for building manageable JBOD solutions. It’s exactly what I needed to complete this Node 804 DAS build, providing a clean and reliable management interface in both hardware and software. It’s already been somewhat of a success in the homelab community, and rightly so.
@TheGuyDanish is extremely talented and has done a great job with this project, I implore you to buy a board from him if you’re looking to undergo a project like this.
The card that was shipped to me was a Lenovo branded card, which is fine on the face of it but the card had a somewhat old firmware version, 20.00.04.00 with the latest being 24.00.00.00.
No problem, just download the latest firmware and use an EFI shell to flash it, right? Wrong.
Since the card was Lenovo branded the usual flashing tools were not working as expected, thankfully someone awesome has written this gist which details how to crossflash the card to the latest firmware.
Once this was done the card was on the latest firmware and capabilities such as NVMe were enabled, something Lenovo had disabled on their firmware for one reason or another. The Lenovo firmware also locked the number of drives that could be connected to the card, thankfully this also was easily fixed with the crossflash. After flashing the card I was able to see the following:
shell
Basics :======Controller = 0Adapter Type = SAS3416(B0)Model = 430-16i SAS HBASerial Number = SP80430825Current System Date/time = 02/24/2025 12:20:34Concurrent commands supported = 6144SAS Address = 500605b00dba8c20PCI Address = 00:01:00:00Version :=======Firmware Package Build = 24.00.00.00Firmware Version = 24.00.00.00Bios Version = 09.47.00.00_24.00.00.00NVDATA Version = 24.00.00.24PSOC Version = 05689001PSOC FW Version = 0x0001PSOC Part Number = 05689Driver Name = mpt3sasDriver Version = 43.100.00.00Capabilities :============Supported Drives = SAS, SATA, NVMeEnable JBOD = YesMax Parallel Commands = 6144Max SGE Count = 128Max Data Transfer Size = 32 sectorsMax Strips PerIO = 0Max Configurable CacheCade Size = 0Min Strip Size = 512BytesMax Strip Size = 512BytesSupported Adapter Operations :============================Support more than 8 Phys = Yes
Note that the model number did not change with the crossflash, not sure what that’s about but it doesn’t matter. Also to note, in that GitHub thread there is someone who claims to have a dud card stating the clones are no good.
This is, again, foreshadowing.
Whilst it is hard to know if the HBA is a clone, it’s safe to assume that this is the case considering the source and price of card. Whilst this is not something I really care about as long as it takes official firmware and functions as expected, it’s certainly something to note.
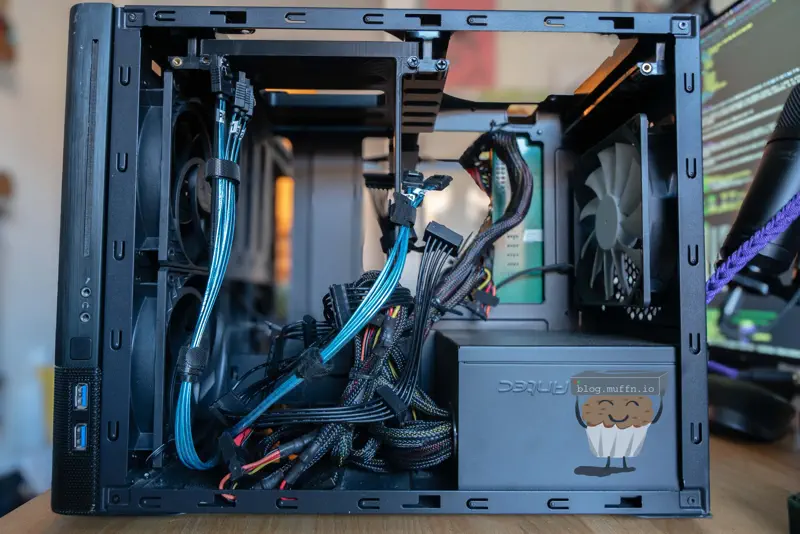
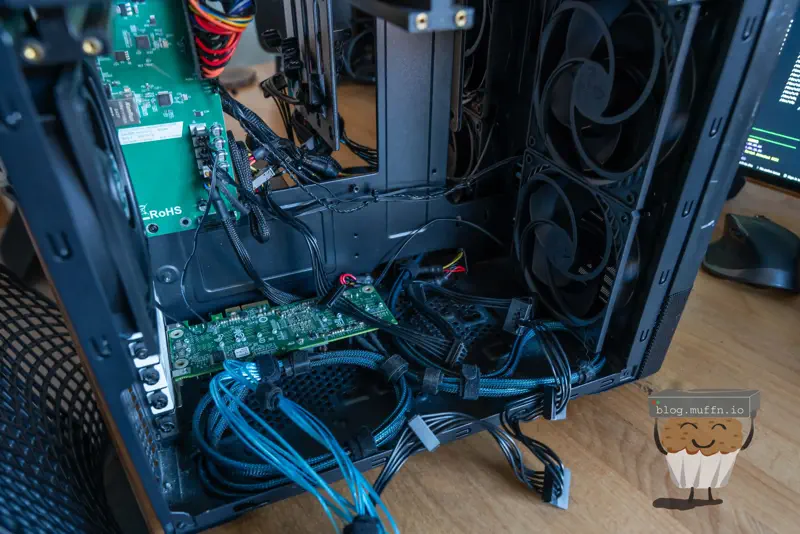
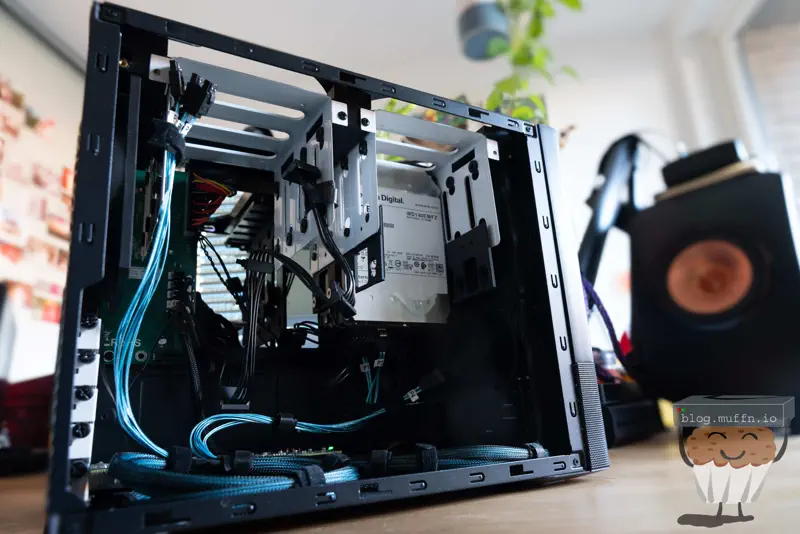
Putting everything together is straightforward. I made sure to connect and route all the cables for future disks. With everything in looms, adding more disks in the future just means slotting them into the hanger and the relevant cables are already in place.
The PSU is not modular so it is quite a mess behind the PSU but this isn’t an issue, it clears the HDD hangers.
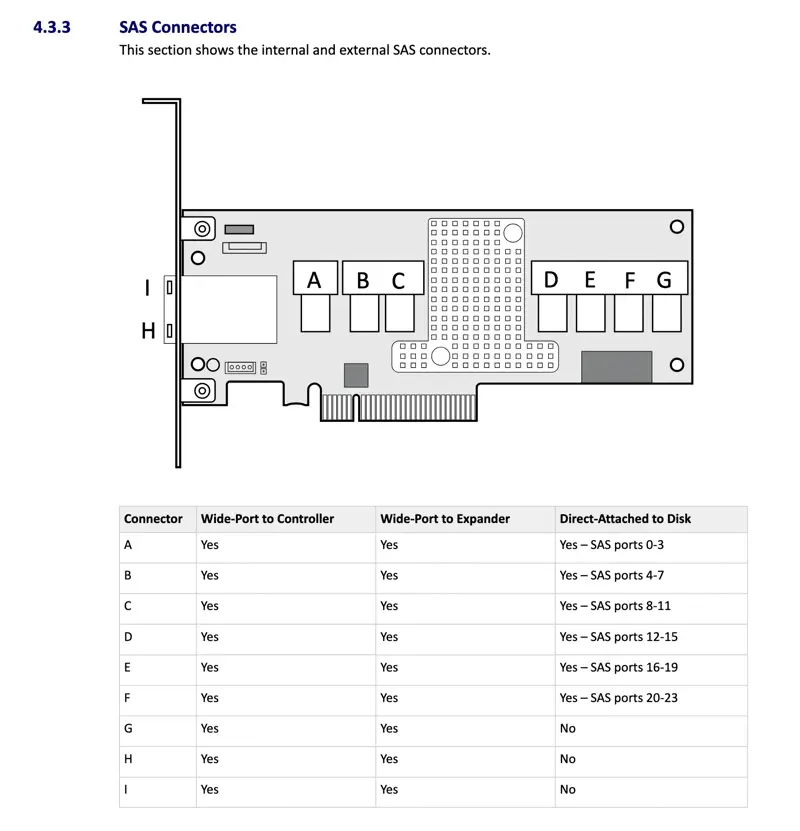
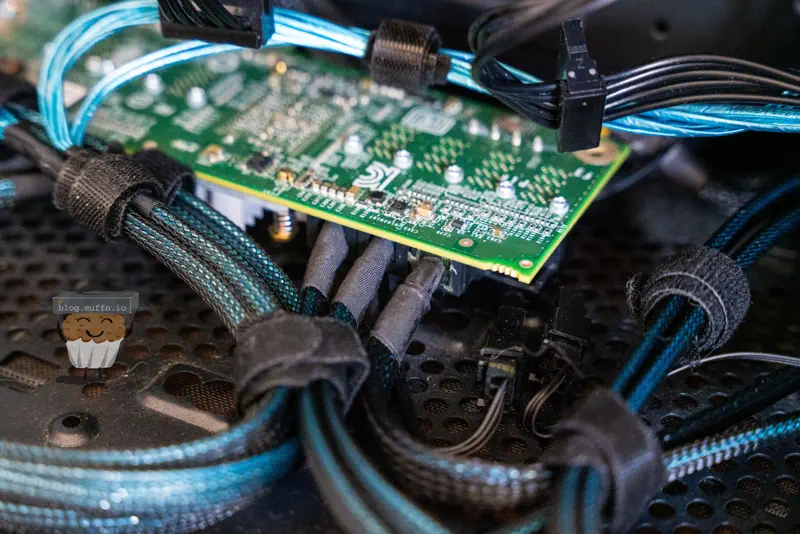
When connecting the disks to the expander it’s important to note which ports are designated for disks, and which for further expanders/uplinks. If you see otherwise on this post, it was purely for the purposes of taking photos.
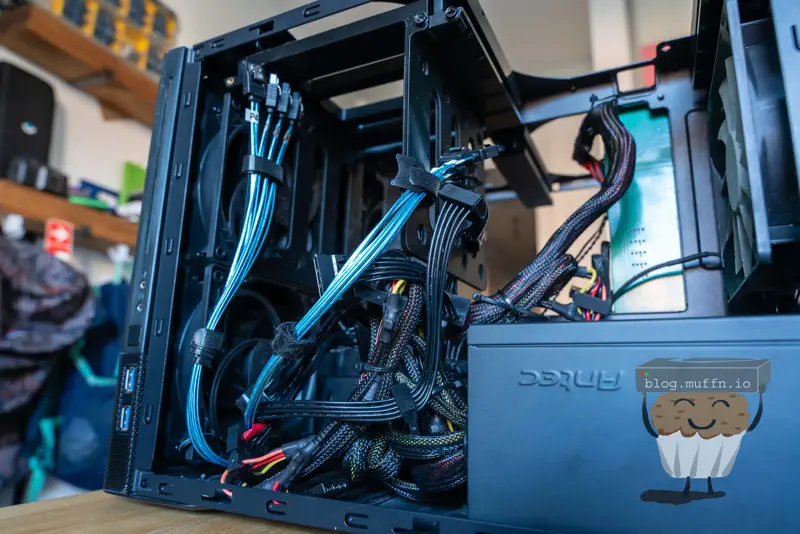
The SAS breakout cables are longer than required for a lot of the connections, or ’to-be’ connections, so I looped them at the bottom of the case and think it turned out pretty well.
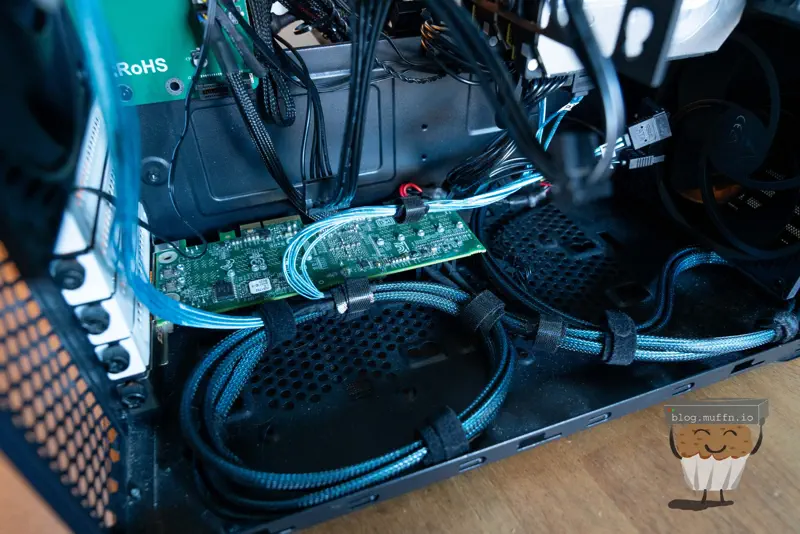
You will notice that I placed the expander at the bottom of the case to keep everything neater. It’s powered via Molex as mentioned previously, the PCI teeth on the expander are used only for power when connected, so it doesn’t need to be plugged into a slot as long as it’s powered another way.
Plugging the card into OpenJBOD to power it that way would work, but then the HDD hanger wouldn’t be able to slot in as the card would be in the way. This is why you see the OpenJBOD board without the expander.
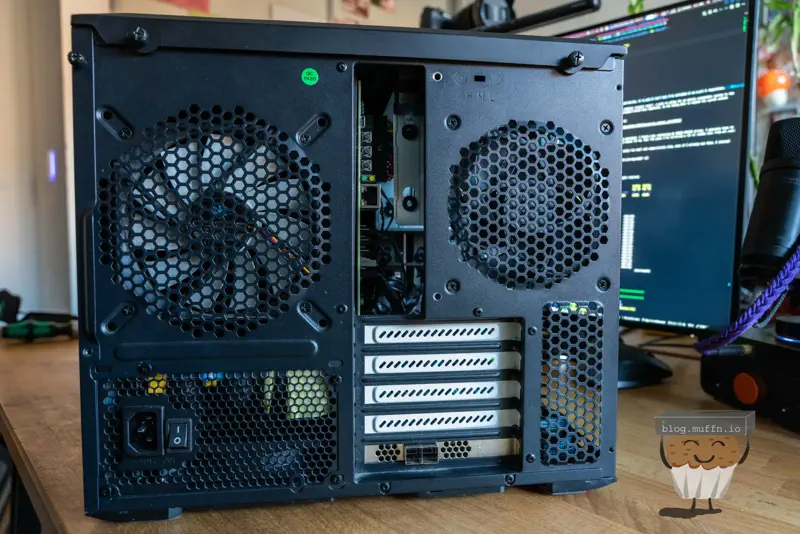
And here’s the back with the OpenJBOD in the IO area (I still need to 3D print an IO shield for it) and the expander at the bottom presenting all the disks via SFF-8643.
And finally, the disks themselves. For now I just have 2x 14TB disks to put into the DAS because that’s the entire point of this DAS and MANS, the ability to add disks as needed.
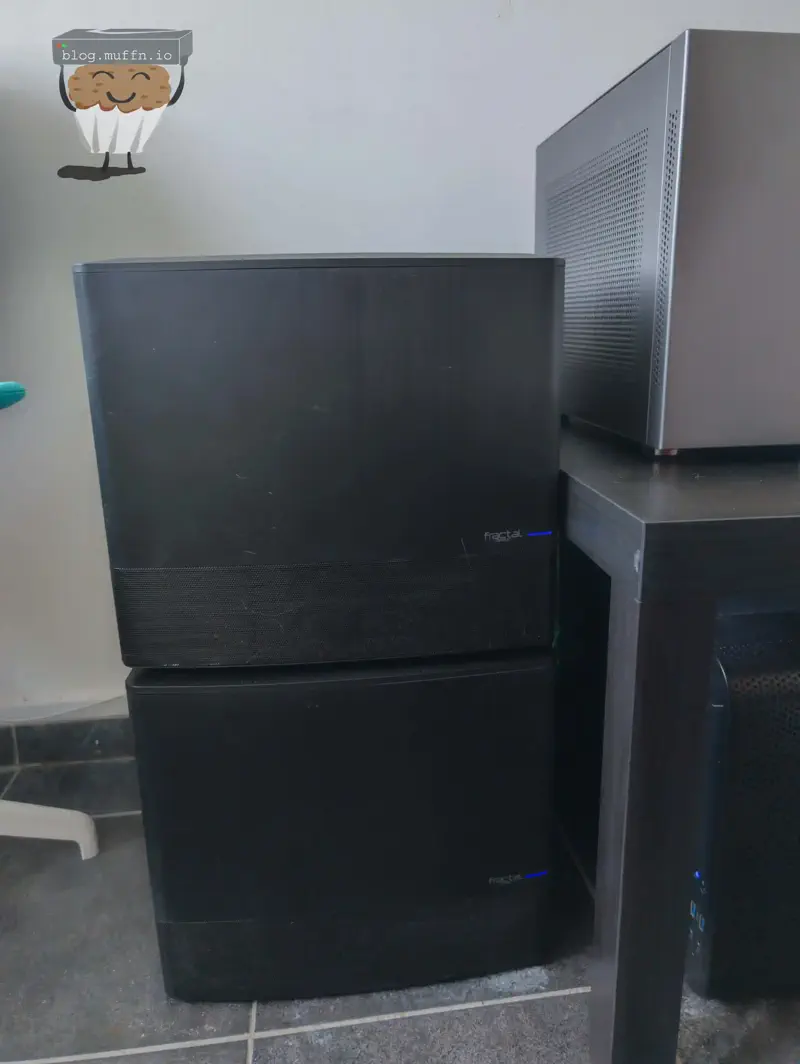
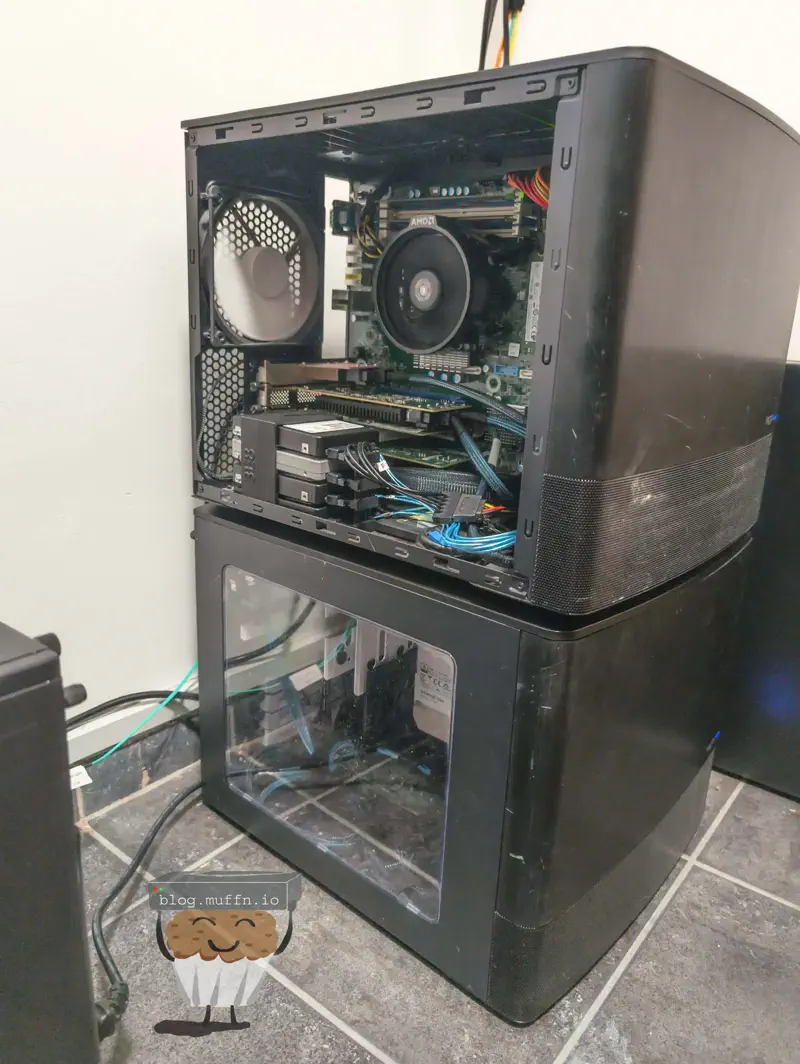
And with that, all that was needed was to physically take the DAS over and plug it all in. My main homelab site is in a small backoffice of a working business, so I don’t have much to play with in terms of space but it does the job and it’s ✨free✨.
I put the actual NAS on the top as the DAS would be much heavier once populated and it seemed to make sense. These photos are not pretty I’m afraid as they were very much an afterthought, but you can see the stack in all of its glory.
The connections at the back are very simple, only 3 connections are made with 2 being required. Power, SAS to the NAS and, optionally, management to OpenJBOD.
With everything connected I made sure the disks were showing as I would have expected, which they were and simply amended my MANS config to include the 2 new disks, ran MANS and after accepting the following Ansible prompt:
shell
TASK [manage_disks_nas : Prompt user for confirmation to wipe and reformat disks] ***************************************************************************************[manage_disks_nas : Prompt user for confirmation to wipe and reformat disks]The following actions will be performed:- Wipe disk labels for: * /dev/disk/by-id/ata-WDC_WD140EMFZ-11A0WA0_9RHNRWWC * /dev/disk/by-id/ata-WDC_WD140EMFZ-11A0WA0_Z2KB0WMT - Create BTRFS filesystem on: * /dev/disk/by-id/ata-WDC_WD140EMFZ-11A0WA0_9RHNRWWC * /dev/disk/by-id/ata-WDC_WD140EMFZ-11A0WA0_Z2KB0WMT - Create EXT4 filesystem on: Existing cache paths: WARNING: This will result in data loss on the affected disks.Do you want to proceed? [y/N]:
Now whenever I need more storage I’ll simply buy a disk or two at a time, slap ’em in and re-run MANS. Easy peasy, and more importantly, flexible and cheap. Speaking of cheap…
Yeah so, that foreshadowing? It turns out fake Chinese HBAs are a waste of sand, to the surprise of no one.
Not too long after the array was in use, I noticed that the disks in the DAS would sometimes fall offline. I wouldn’t be able to see them mounted, but the devices were physically there on the system, though if I tried to re-mount them the prompt would hang indefinitely. The only fix was to reboot the system after which suddenly everything would be mounted and working again.
After a few times of this happening and confirming the SMART data of the disks was fine, I started looking into the logs, and well, they said it all.
The most telling sign of HBA ‘failure’ was synchronised I/O errors across multiple drives.
bash
Apr 02 05:49:20 aah-fs01 kernel: Buffer I/O error on dev sdb, logical block 1465130624, async page readApr 02 05:49:20 aah-fs01 kernel: Buffer I/O error on dev sde, logical block 0, async page readApr 02 05:49:20 aah-fs01 kernel: Buffer I/O error on dev sdc, logical block 1465130624, async page read
This was pretty evidently the HBA not working correctly, as I would see numerous I/O errors affecting sectors on multiple drives exactly at the same time:
bash
Apr 02 05:49:26 aah-fs01 kernel: I/O error, dev sdb, sector 0 op 0x0:(READ) flags 0x0 phys_seg 31 prio class 2Apr 02 05:49:26 aah-fs01 kernel: I/O error, dev sdc, sector 0 op 0x0:(READ) flags 0x0 phys_seg 1 prio class 2Apr 02 05:49:26 aah-fs01 kernel: I/O error, dev sde, sector 0 op 0x0:(READ) flags 0x0 phys_seg 1 prio class 2
bash
Apr 02 05:50:03 aah-fs01 kernel: I/O error, dev sdb, sector 11721044992 op 0x0:(READ) flags 0x0 phys_seg 1 prio class 2Apr 02 05:50:03 aah-fs01 kernel: Buffer I/O error on dev sdb, logical block 1465130624, async page readApr 02 05:50:03 aah-fs01 kernel: I/O error, dev sdc, sector 11721044992 op 0x0:(READ) flags 0x0 phys_seg 1 prio class 2Apr 02 05:50:03 aah-fs01 kernel: Buffer I/O error on dev sdc, logical block 1465130624, async page readApr 02 05:50:03 aah-fs01 kernel: I/O error, dev sde, sector 0 op 0x0:(READ) flags 0x0 phys_seg 1 prio class 2Apr 02 05:50:03 aah-fs01 kernel: Buffer I/O error on dev sde, logical block 0, async page read
When testing the system with a simple write operation directly to the affected disks, it would hang indefinitely with processes stuck in uninterruptible I/O wait states:
The HBA itself was still showing as operational throughout this and would report the disks as being there and operational, so there wasn’t much more to be done.
I ended up ordering a legit 9400-16i from eBay UK, with proper serials and branding on the silkscreen. Since installing this card I haven’t had any weird I/O errors. I am slightly worried about the expander now as that is almost certainly a counterfeit as well, but we’ll see. To my current knowledge, there’s not a lot of diagnostics I can run on the expander if I start to see issues, but I will be sure to update this post if I start to see anything.
I’ve been running this setup now for about 10 months and the counterfeit expander has been running well. I don’t see any weird I/O errors or dropouts, so whilst the Chinese HBA was a dud, the expander seems to be fine. I did have issues with disks dropping into RO mode which I eventually figured out was due to spindown and the disks not spinning back up quickly enough for BTRFS. I added a comment about this on the MANS repo.